
Flutter development in 2026 remains a toolchain story — a set of applications, SDKs, and operating system components that must work in concert. FlutterFlow has matured significantly as a visual development platform, and its browser-based environment handles a great deal of the complexity that used to trip up newcomers. Even so, real on-device testing, banner ad debugging, in-app purchase flows, and deep performance profiling still benefit enormously from a fully configured local toolchain. If you are building a production Flutter app with FlutterFlow, getting your Mac set up properly is still time well spent.
Apple Silicon Macs are now the clear default for Flutter development. The Mac Studio powered by M2 Ultra or M4 Ultra is an exceptional, near-silent desktop machine that handles Android emulators, iOS simulators, and Dart compilation simultaneously without breaking a sweat. If a Mac Studio feels like overkill, any current MacBook Pro or Mac Mini with an M3 or M4 chip will serve you extremely well. The era of Rosetta workarounds, bad-CPU-type errors, and Apple Silicon patches is firmly behind us — the entire Flutter and Android toolchain now runs natively on Apple Silicon.
TL:DR – macOS remains a superb Flutter development environment in 2026. The Apple Silicon compatibility headaches that plagued early M1 setups are resolved. Pick any current Mac, follow the steps below, and you will be productive quickly.
Contents
What's changed in 2026
A lot has improved since the early Apple Silicon days described in older guides. Here is a quick summary of what is different today:
- Flutter 3.x is well established. Flutter has continued its stable release cadence and the SDK now installs cleanly on Apple Silicon without any patching, workarounds, or Rosetta configuration. The
flutter_m1_patcherpackage is long retired and should be removed from any legacy projects. - Android Studio is now named Android Studio Ladybug (2024) or later. References to older releases such as Chipmunk or Electric Eel are obsolete. The current release ships with the latest Gradle and Android Gradle Plugin versions that support Apple Silicon natively.
- Gradle and the Android Gradle Plugin have moved on. Projects generated by FlutterFlow today target much newer Gradle wrapper and plugin versions than the 7.x era described in older articles. You generally no longer need to manually edit
build.gradleto fix Apple Silicon compatibility — FlutterFlow's exported projects are configured correctly out of the box. - FlutterFlow now offers a desktop app for macOS alongside its browser-based editor, giving tighter integration with your local toolchain for running and debugging directly from within FlutterFlow.
- Xcode requirements have advanced. iOS and macOS targets now require a recent Xcode release. CocoaPods, which was once optional for Android-only developers, is now straightforwardly installed via Homebrew and is worth setting up from the start even if your initial target is Android.
- Android emulators on Apple Silicon are fast and reliable. The ARM-based emulator images that were new and experimental a few years ago are now the standard. They are dramatically faster than the old x86 images running under Rosetta.
A FlutterFlow-based Flutter app: DevTools debugger running from a Mac against a connected Android device
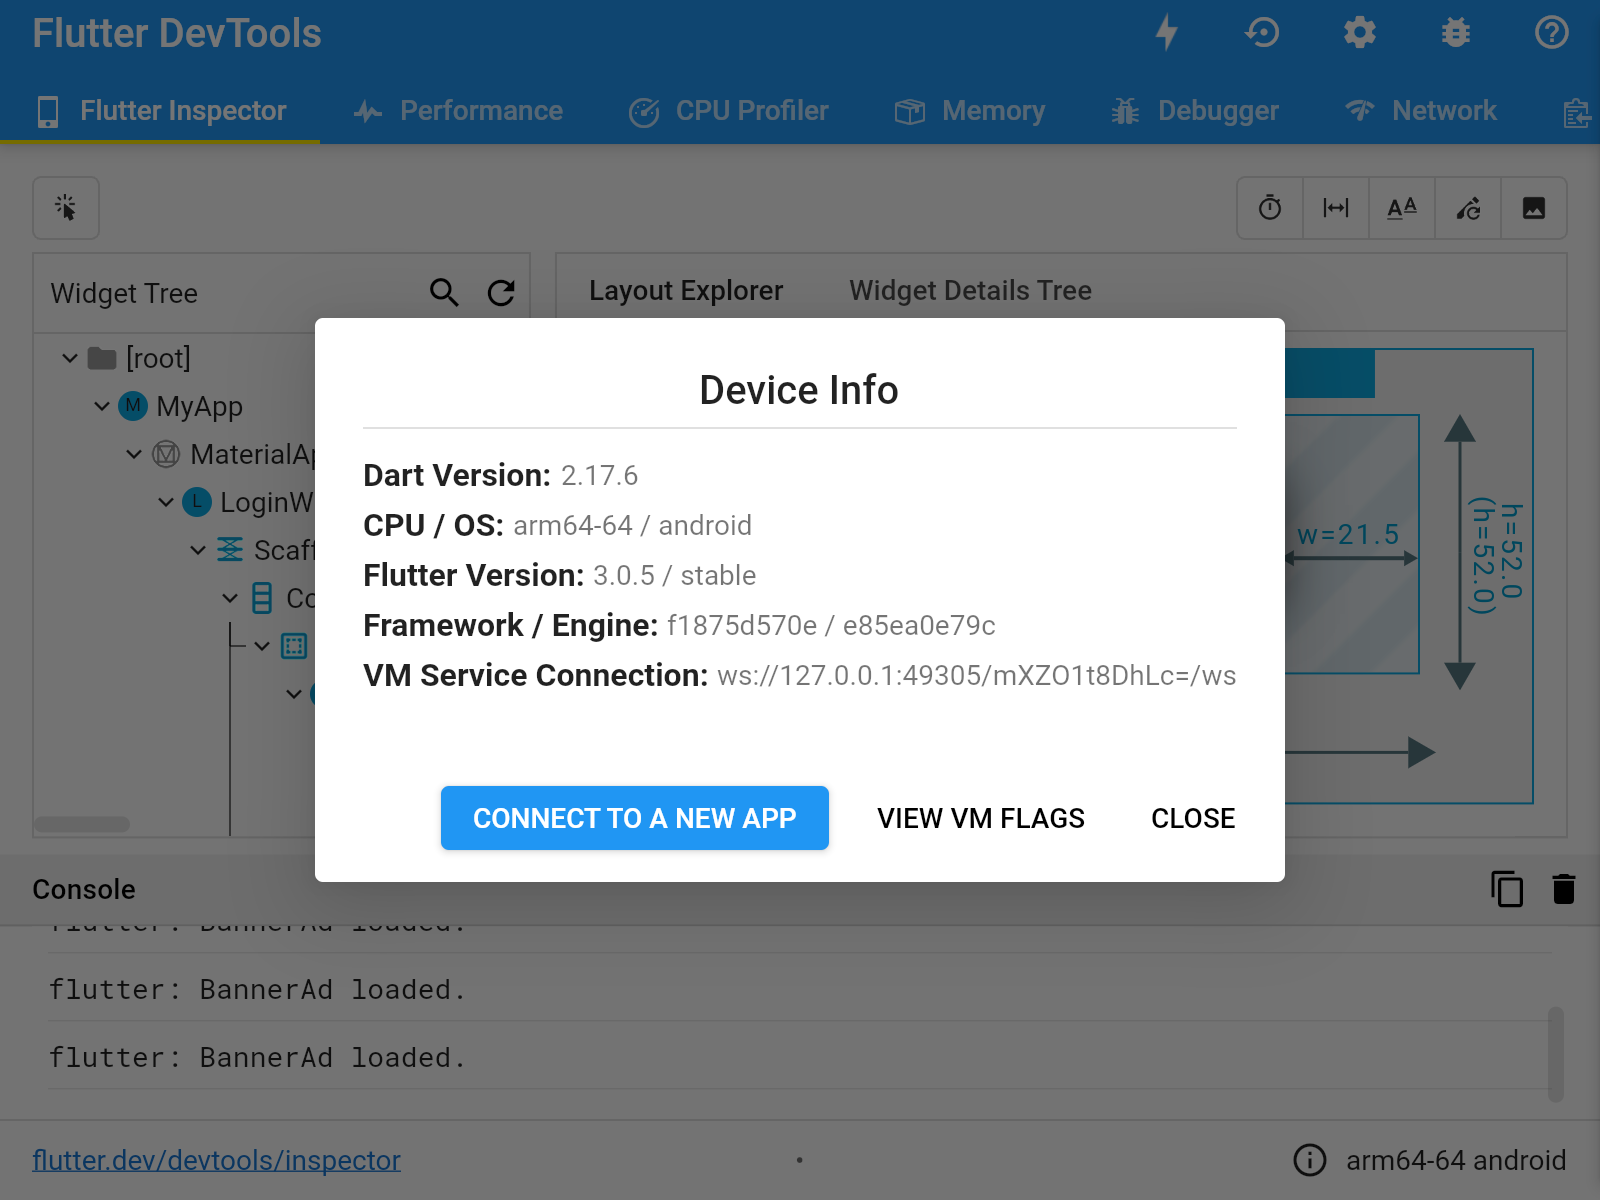
The screenshot above shows Flutter DevTools running against a FlutterFlow-generated app on a physical Android device connected directly to a Mac via USB. This workflow — export from FlutterFlow, open in Android Studio or VS Code, attach DevTools — is the recommended path for any serious debugging work that goes beyond what FlutterFlow's built-in preview can offer.
Installing Flutter on a Mac in 2026
The steps below reflect the current recommended setup for an Apple Silicon Mac running a recent version of macOS. The process is considerably smoother than it was in the early M1 days.
- Install Xcode from the App Store. After installation, open Xcode once to accept the licence agreement and let it install additional components. Then install the Command Line Tools either via Xcode's preferences or by running
xcode-select --installin Terminal. Keep Xcode updated — Flutter and CocoaPods both have minimum Xcode version requirements that advance over time. - Install Homebrew. Homebrew remains the most straightforward way to manage macOS developer dependencies. Get it from brew.sh. Once installed, use it to install CocoaPods:
brew install cocoapods. Unlike older approaches involving the system Ruby gem installer, the Homebrew route avoids permission issues and keeps CocoaPods easy to update. - Install the Flutter SDK. The recommended approach in 2026 is to use the Flutter installer or to place the SDK in a user-owned directory such as
/Users/yourusername/development/flutter. Avoid placing it inside system directories — macOS System Integrity Protection (SIP) and the APFS filesystem can cause unexpected behaviour in those locations. Add the SDK to your path by adding the following line to your~/.zshrc:export PATH="$PATH:/Users/yourusername/development/flutter/bin"
Then runsource ~/.zshrcto apply the change immediately. - Install Android Studio (current release). Download the latest stable release of Android Studio from developer.android.com/studio. Make sure you download the Apple Silicon (ARM) build — it is now clearly labelled on the download page. Open Android Studio, complete the setup wizard, and let it download the Android SDK.
- Configure the Android SDK via the SDK Manager. In Android Studio, open the SDK Manager from the main welcome screen or from the Settings menu. Under SDK Platforms, install the Android API level you are targeting. Under SDK Tools, ensure you have the Android SDK Build-Tools, Android Emulator, Android SDK Platform-Tools, and the Command-line Tools installed. The current versions of all these tools support Apple Silicon natively.
- Accept Android licences. Run
flutter doctor --android-licensesin Terminal and accept all prompts. This is a step that catches many people out. - Run
flutter doctor. A healthy output on a current Mac should show all green ticks or only minor advisory notes. A clean result looks broadly like this:% flutter doctor Doctor summary (to see all details, run flutter doctor -v): [✓] Flutter (Channel stable, on macOS darwin-arm64, locale en-GB) [✓] Android toolchain - develop for Android devices (Android SDK version 35.x.x) [✓] Xcode - develop for iOS and macOS (Xcode 16.x) [✓] CocoaPods (version 1.15.x) [✓] Chrome - develop for the web [✓] Android Studio (version 2024.x) [✓] Connected device (3 available) [✓] Network resources No issues found!
Working with FlutterFlow-exported projects
FlutterFlow generates clean Flutter project code that you can download and open directly in Android Studio or VS Code. In 2026, exported projects are configured for current Gradle versions and modern Android API targets. You should rarely need to manually edit Gradle configuration files to get a FlutterFlow project building locally — if you do, the FlutterFlow documentation and community forums are well maintained and worth checking first.
For teams that want to stay closer to FlutterFlow's managed environment, FlutterFlow's GitHub integration allows continuous export to a repository, which you can then pull locally whenever you need to run native debugging tools. This is a clean workflow that keeps your local code in sync without manual downloads.
If you are working on features that require local testing — such as in-app purchases, push notifications, camera access, or advertising SDKs — the local toolchain described in this article is essential. FlutterFlow's browser preview cannot simulate these platform-level interactions, and the Flutter DevTools profiler running against a real device remains the gold standard for catching performance regressions before they reach your users.
Android emulators on Apple Silicon
One of the most meaningful improvements for Mac-based Flutter developers over the past few years has been the Android emulator. ARM-based Android Virtual Devices (AVDs) running on Apple Silicon are fast, stable, and closely match the behaviour of real devices. When creating a new AVD in Android Studio's Device Manager, select a system image from the ARM Images tab — these run natively on your Mac without any translation layer. Emulator startup times are measured in seconds rather than minutes, and the experience is close enough to a physical device for most development and testing purposes.
For final testing of payment flows, advertising integrations, and anything that touches hardware sensors, a physical device connected via USB is still the most reliable option. Flutter's USB debugging workflow on macOS is straightforward: enable Developer Options on your Android device, connect via USB, and the device will appear in flutter devices and in Android Studio's device selector.
VS Code as an alternative to Android Studio
While Android Studio provides the most integrated experience for Android SDK management, many Flutter developers — including those working primarily with FlutterFlow exports — prefer VS Code for day-to-day editing and debugging. The Flutter and Dart extensions for VS Code are actively maintained and provide hot reload, DevTools integration, and device selection. VS Code tends to feel lighter on system resources, which matters less on a current Mac but is still a pleasant quality-of-life difference during long development sessions.
You still need Android Studio installed for its SDK and emulator tooling even if VS Code is your primary editor. The two tools coexist without conflict.
Resources
- Flutter for macOS installation guide: docs.flutter.dev
- Homebrew package manager for macOS: brew.sh
- Android Studio download (select the Apple Silicon build): developer.android.com/studio
- Android SDK Manager documentation: developer.android.com/tools/sdkmanager
- Android Emulator documentation: developer.android.com/studio/releases/emulator
- FlutterFlow documentation and GitHub integration: docs.flutterflow.io
- Flutter DevTools documentation: docs.flutter.dev/tools/devtools
- CocoaPods getting started guide: guides.cocoapods.org