Multizone | All our technotes
If we've published it, you can find it here.

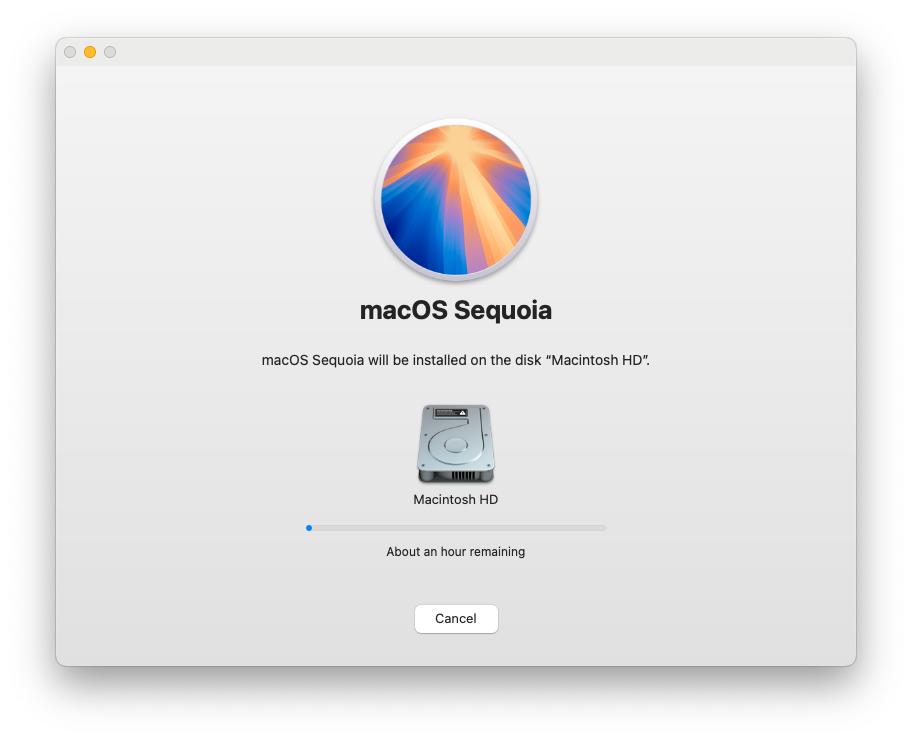
My Mac mini (2018) had a good run, but by early 2026 it's very clear that Intel Macs are firmly in Apple's rear-view mirror. The machine is still nominally supported — Apple hasn't officially dropped it yet — but the cracks are showing. It refused to install macOS Sequoia 15.3.2 no matter what I threw at it, and I tried pretty much everything. Is this Apple gently nudging Intel holdouts toward the exit? Possibly. For me it became the final push I needed to fully commit to Apple silicon and abandon my last foothold in x86 virtualisation on macOS. That's not a trivial decision when you still have working virtual machines you depend on — but as it turned out, the transition was far smoother than I feared.
TL;DR — macOS Sequoia 15.3.2 refused to install on my Mac Mini (2018) despite exhausting every standard troubleshooting route. I eventually erased the machine, reverted to macOS Sonoma, sold it, and moved on. If you're in the same boat, read on — the good news is that your Intel VMs don't have to die with the hardware.
{ToC}
Where things stand in 2026
When this saga started, macOS Sequoia 15.3.2 was the latest release. By 2026, Apple has pushed on further, and the gap between what Apple silicon Macs receive and what Intel machines can reliably run has widened noticeably. The Mac Mini (2018) remains on Apple's supported list for Sequoia — on paper — but real-world experience, including mine, suggests that "supported" is doing a lot of heavy lifting. Installation failures, degraded performance, and features silently withheld from Intel hardware are increasingly common complaints in the community. If you're still running a 2018 Mac Mini daily, this article should feel very familiar.
It's also worth noting that the Mac Mini itself has moved on dramatically. Apple's current Mac Mini lineup — powered by M4 and M4 Pro chips — is a generational leap in every measurable way. Prices have remained broadly similar to where they were at launch, making the value case for hanging onto ageing Intel hardware weaker than ever. The 2018 model was a fine machine in its time, but 2026 is not its time.
Understanding the macOS Sequoia 15.3.2 update
The macOS Sequoia 15.3.2 update shipped primarily to support the then-new MacBook Air M4 and the M3/M4 Mac Studio ranges, but it also carried a critical security patch for a serious Safari WebKit vulnerability — one that could allow maliciously crafted web content to escape its sandbox. That kind of flaw is not something you want sitting unpatched. The problem is that for some Intel Mac users, the cure proved harder to apply than the disease was to ignore.
Software Update: the first failure
Let's walk through what actually happened. Software Update offered the update, I accepted the licence agreement, the download appeared to proceed — and then:
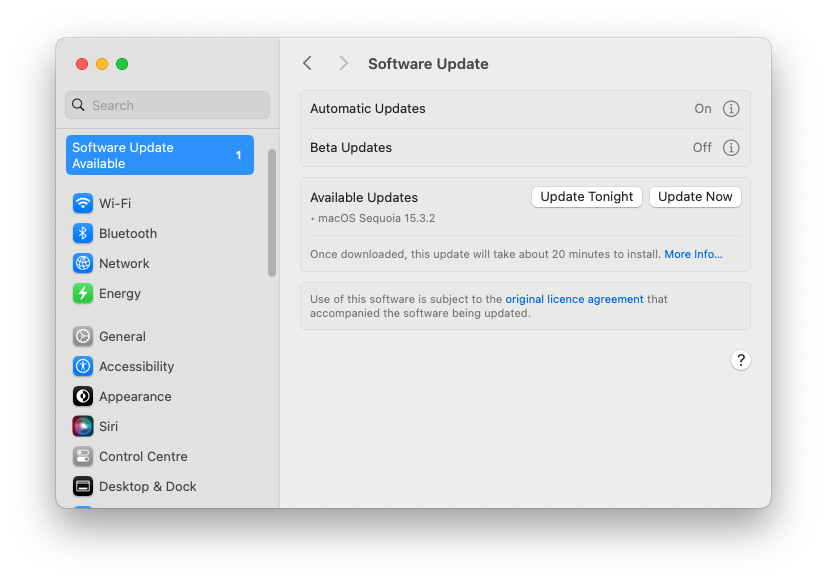

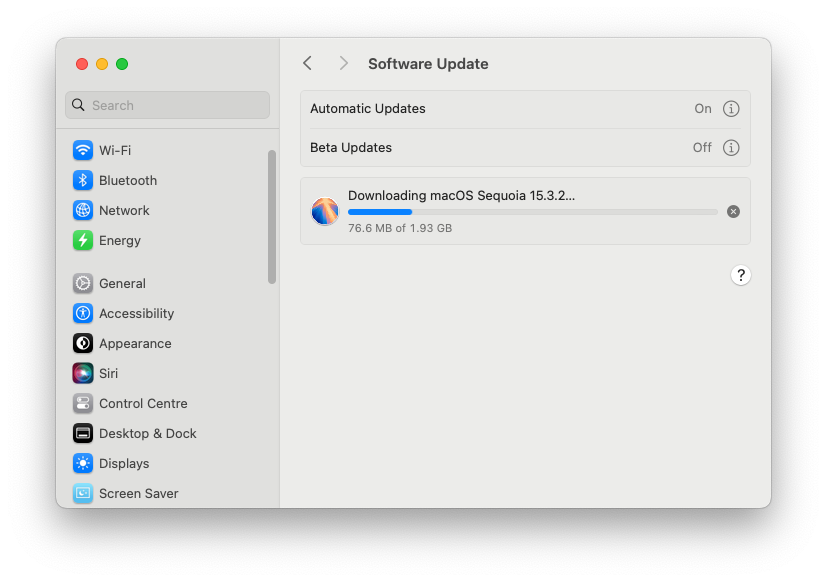
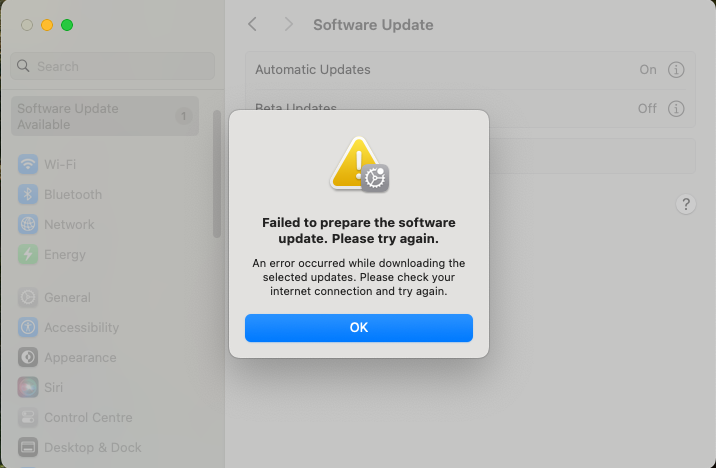
The error message: "Failed to prepare the software update. Please try again. An error occurred while downloading the selected updates. Please check your internet connection and try again." The internet connection was fine. The message is essentially useless — it could mean dozens of things, and Apple's error reporting here is characteristically unhelpful.
Downloading the macOS installer directly from Apple
Apple makes it reasonably straightforward to download a full macOS installer via the App Store. The How to download and install macOS support page lists direct links for each release:
The installer downloads to your Applications folder and opens automatically. You can also quit without installing to keep it there for later — useful if you want to create a bootable USB drive.
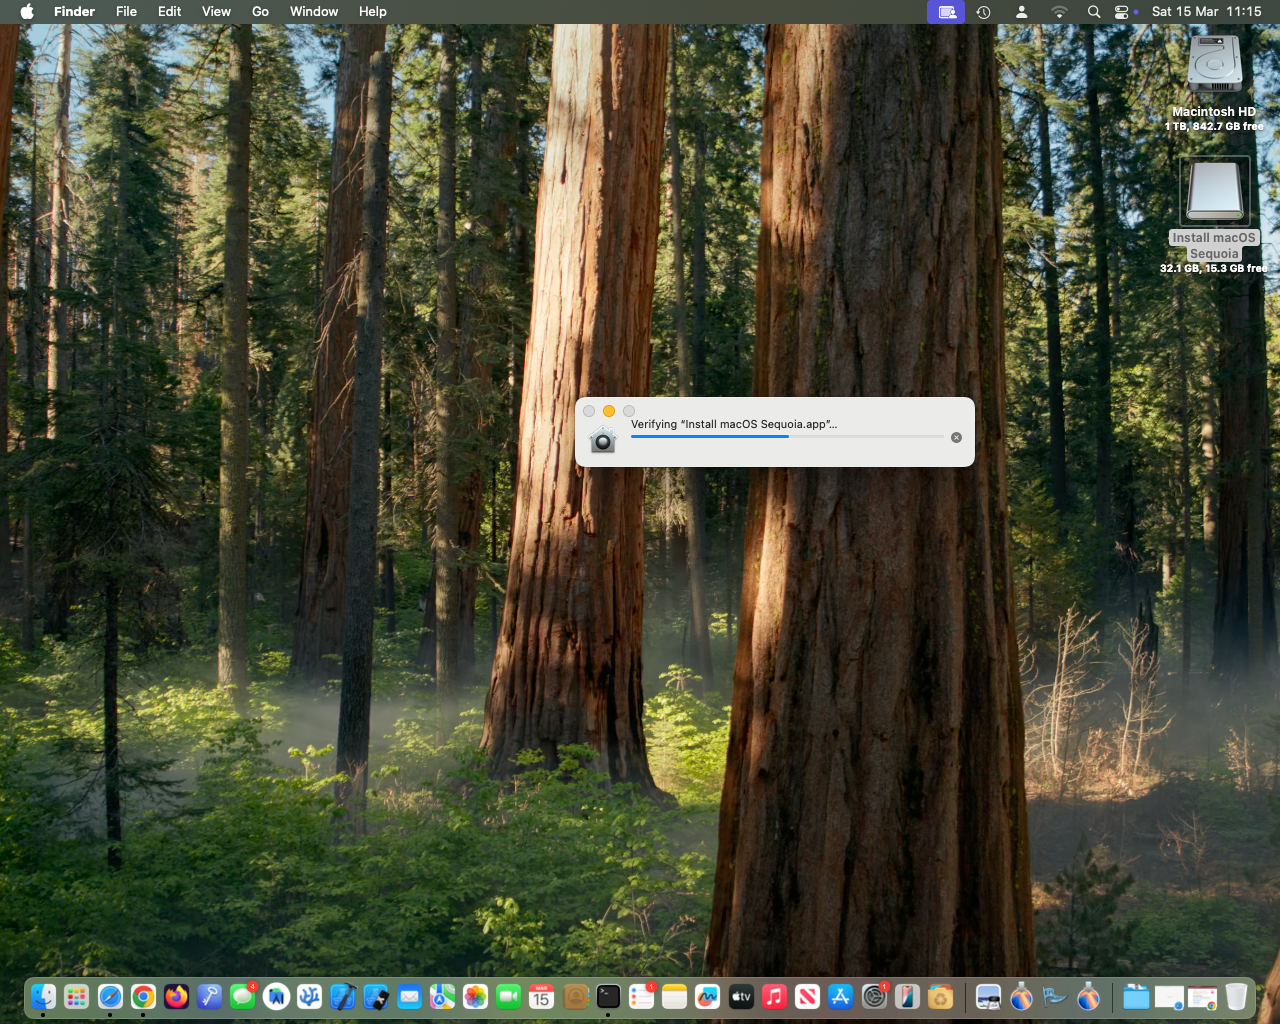
Installer is damaged

The downloaded installer reported itself as damaged. This is a known issue that can occur when an installer's certificate expires, but in this case the timing didn't fit that explanation. Re-downloading produced the same result. Not encouraging.
Disk First Aid
A reasonable hunch: maybe the disk itself was the problem. Disk Utility's First Aid ran cleanly and found nothing wrong.
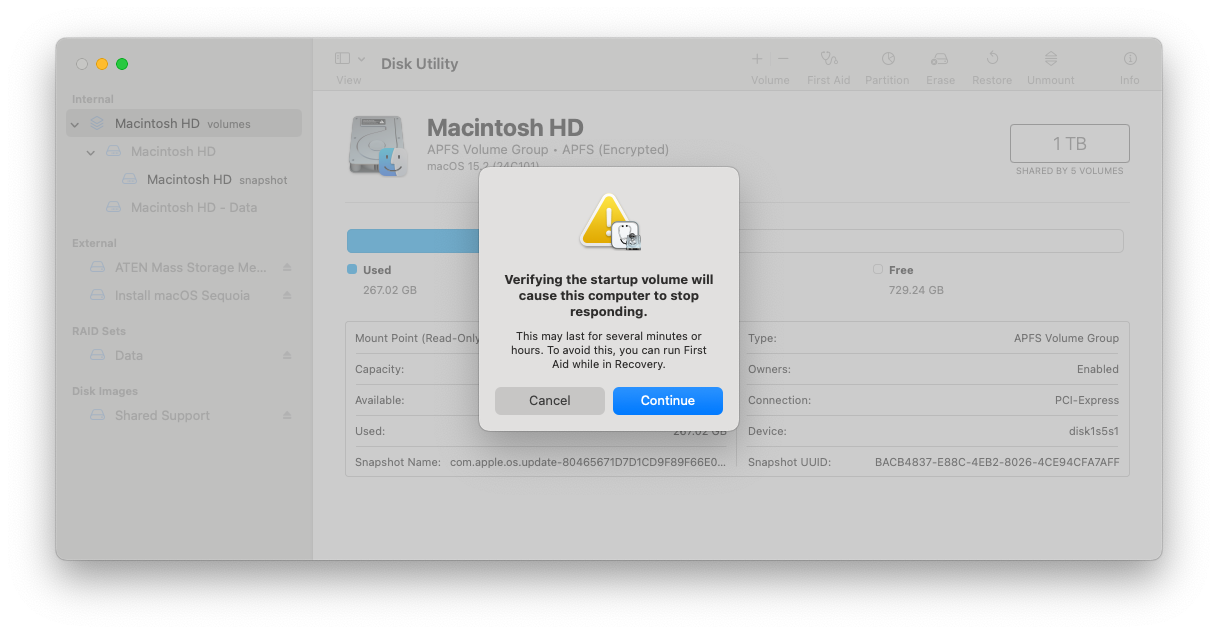
Clean bill of health. Not the problem then.
Creating a bootable installer — and why the Intel Mac couldn't do it
Error: The bless of the installer disk failed
Following Apple's own instructions for creating a bootable macOS installer from the command line produced this on the Intel Mac Mini:
% sudo /Applications/Install\ macOS\ Sequoia.app/Contents/Resources/createinstallmedia --volume /Volumes/Install\ macOS\ Sequoia
Password:
Ready to start.
To continue we need to erase the volume at /Volumes/Install macOS Sequoia.
If you wish to continue type (Y) then press return: Y
Erasing disk: 0%... 10%... 20%... 30%... 100%
Copying essential files...
Copying the macOS RecoveryOS...
Couldn't extract BaseSystem to path: /Volumes/Install macOS Sequoia/BaseSystem
The bless of the installer disk failed.
Reports of this exact error on Intel hardware are widespread. It appears to be a genuine compatibility issue between certain Intel Mac configurations and the Sequoia installer — not user error, not a corrupt download.
Using an Apple silicon Mac to create the boot disk
Running the identical command on an M1 Mac Studio worked immediately:
% sudo /Applications/Install\ macOS\ Sequoia.app/Contents/Resources/createinstallmedia --volume /Volumes/Install\ macOS\ Sequoia
Password:
Ready to start.
To continue we need to erase the volume at /Volumes/Install macOS Sequoia.
If you wish to continue type (Y) then press return: Y
Erasing disk: 0%... 10%... 20%... 30%... 100%
Copying essential files...
Copying the macOS RecoveryOS...
Making disk bootable...
Copying to disk: 0%... 10%... 20%... 30%... 40%... 50%... 60%... 70%... 80%... 90%... 100%
Install media now available at "/Volumes/Install macOS Sequoia"
If you're in this situation and you have access to any Apple silicon Mac — even briefly — this is your best route to creating a working Sequoia USB installer. The Intel Mac simply cannot do it reliably for this release.
Turn off Find My Mac before reinstalling
This matters if your Mac Mini has a T2 chip, which the 2018 model does. Activation Lock will block a clean install if Find My Mac is still enabled. Turn it off in System Settings under your Apple ID before attempting any reinstall from external media or Recovery. You can re-enable it afterwards.
macOS Sequoia USB installer — still failed
The USB stick created on the Mac Studio booted successfully on the Mini after a long wait, began installing, and then hit the same wall. A different error message this time, but the same outcome.
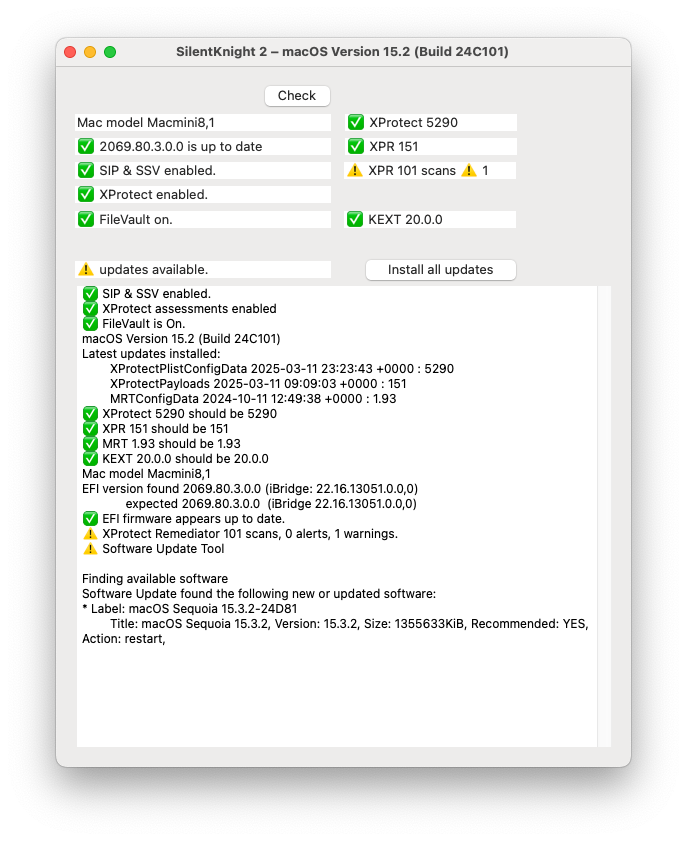
SilentKnight
SilentKnight — Howard Oakley's excellent macOS security auditing tool, still actively maintained and well worth keeping in your toolkit — confirmed the update was available and flagged no underlying system issues beyond an XProtect Remediator note that could safely be set aside.
- Label: macOS Sequoia 15.3.2-24D81
- Title: macOS Sequoia 15.3.2, Version: 15.3.2, Size: 1355633KiB, Recommended: YES, Action: restart
Clicking 'Install all updates' from SilentKnight — not the recommended path for a full OS update, but worth a try — failed identically.
Internet Recovery — a different error, the same result
At this point I suspected a connectivity issue with Apple's update servers, so I tried Internet Recovery (⌘ + Option + R on boot).

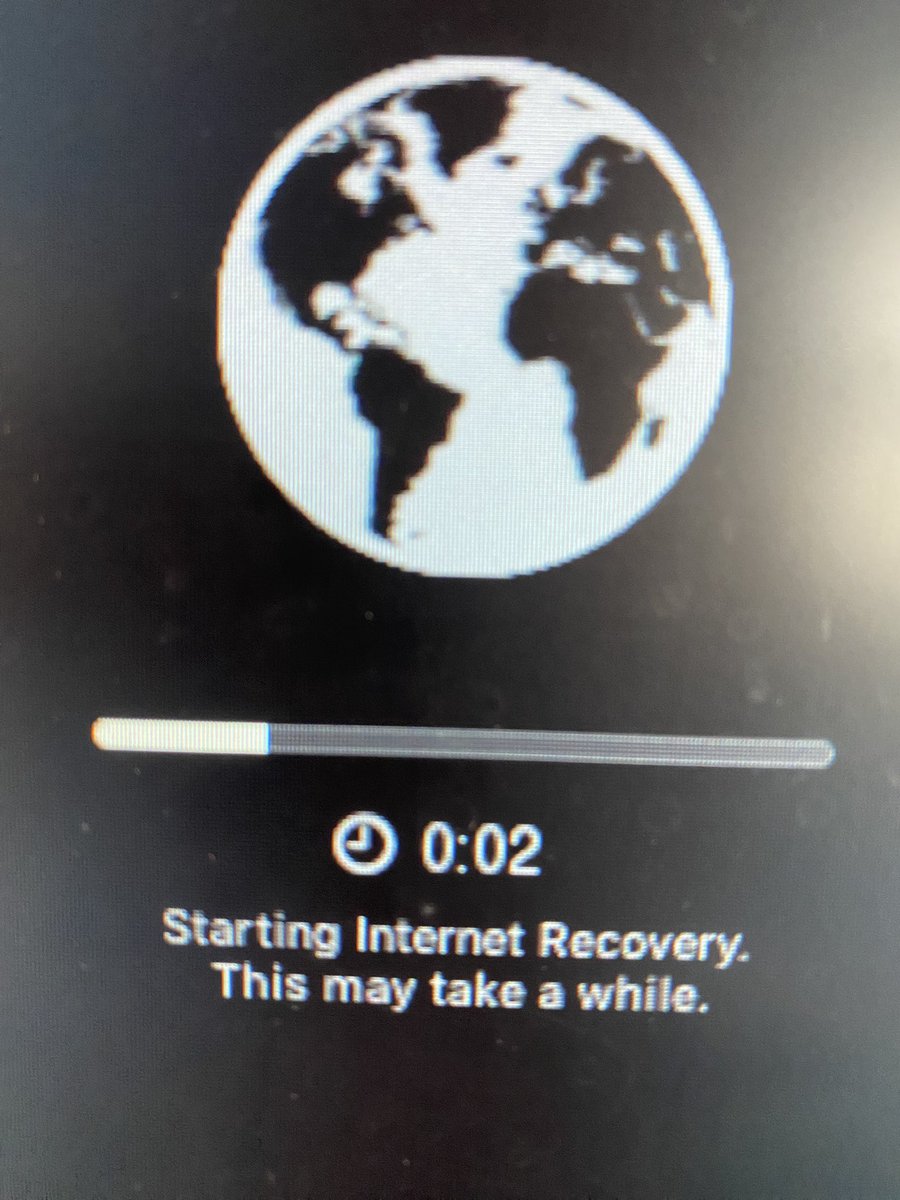

A vague, different error. Still failed. At this point I'd run out of reasonable options.
No fix — reverted to Sonoma and sold it
I created a macOS Sonoma USB installer using the same drive. It installed without complaint. That told me what I needed to know: this was a Sequoia-specific problem on this hardware, not a general fault with the machine. The Mac Mini was healthy — it just couldn't run Sequoia 15.3.2.
I wiped it back to factory condition and sold it. No regrets.
Cost of ownership — Mac Mini (2018)
I bought this Mac Mini for £720 in March 2023 from Computer Exchange and sold it back to them for £201 in March 2025 — a total cost of £519 over two years, or roughly £4.93 per week. For what it provided — a safety net while I transitioned to Apple silicon, plus a native x86 environment for legacy VMs — that's not bad value. But the insurance policy had expired, and it was time to stop paying the premium.
By 2026, second-hand prices for the 2018 Mac Mini have softened further as the market recognises it's approaching end of mainstream support. If you're thinking of selling yours, sooner is better than later.
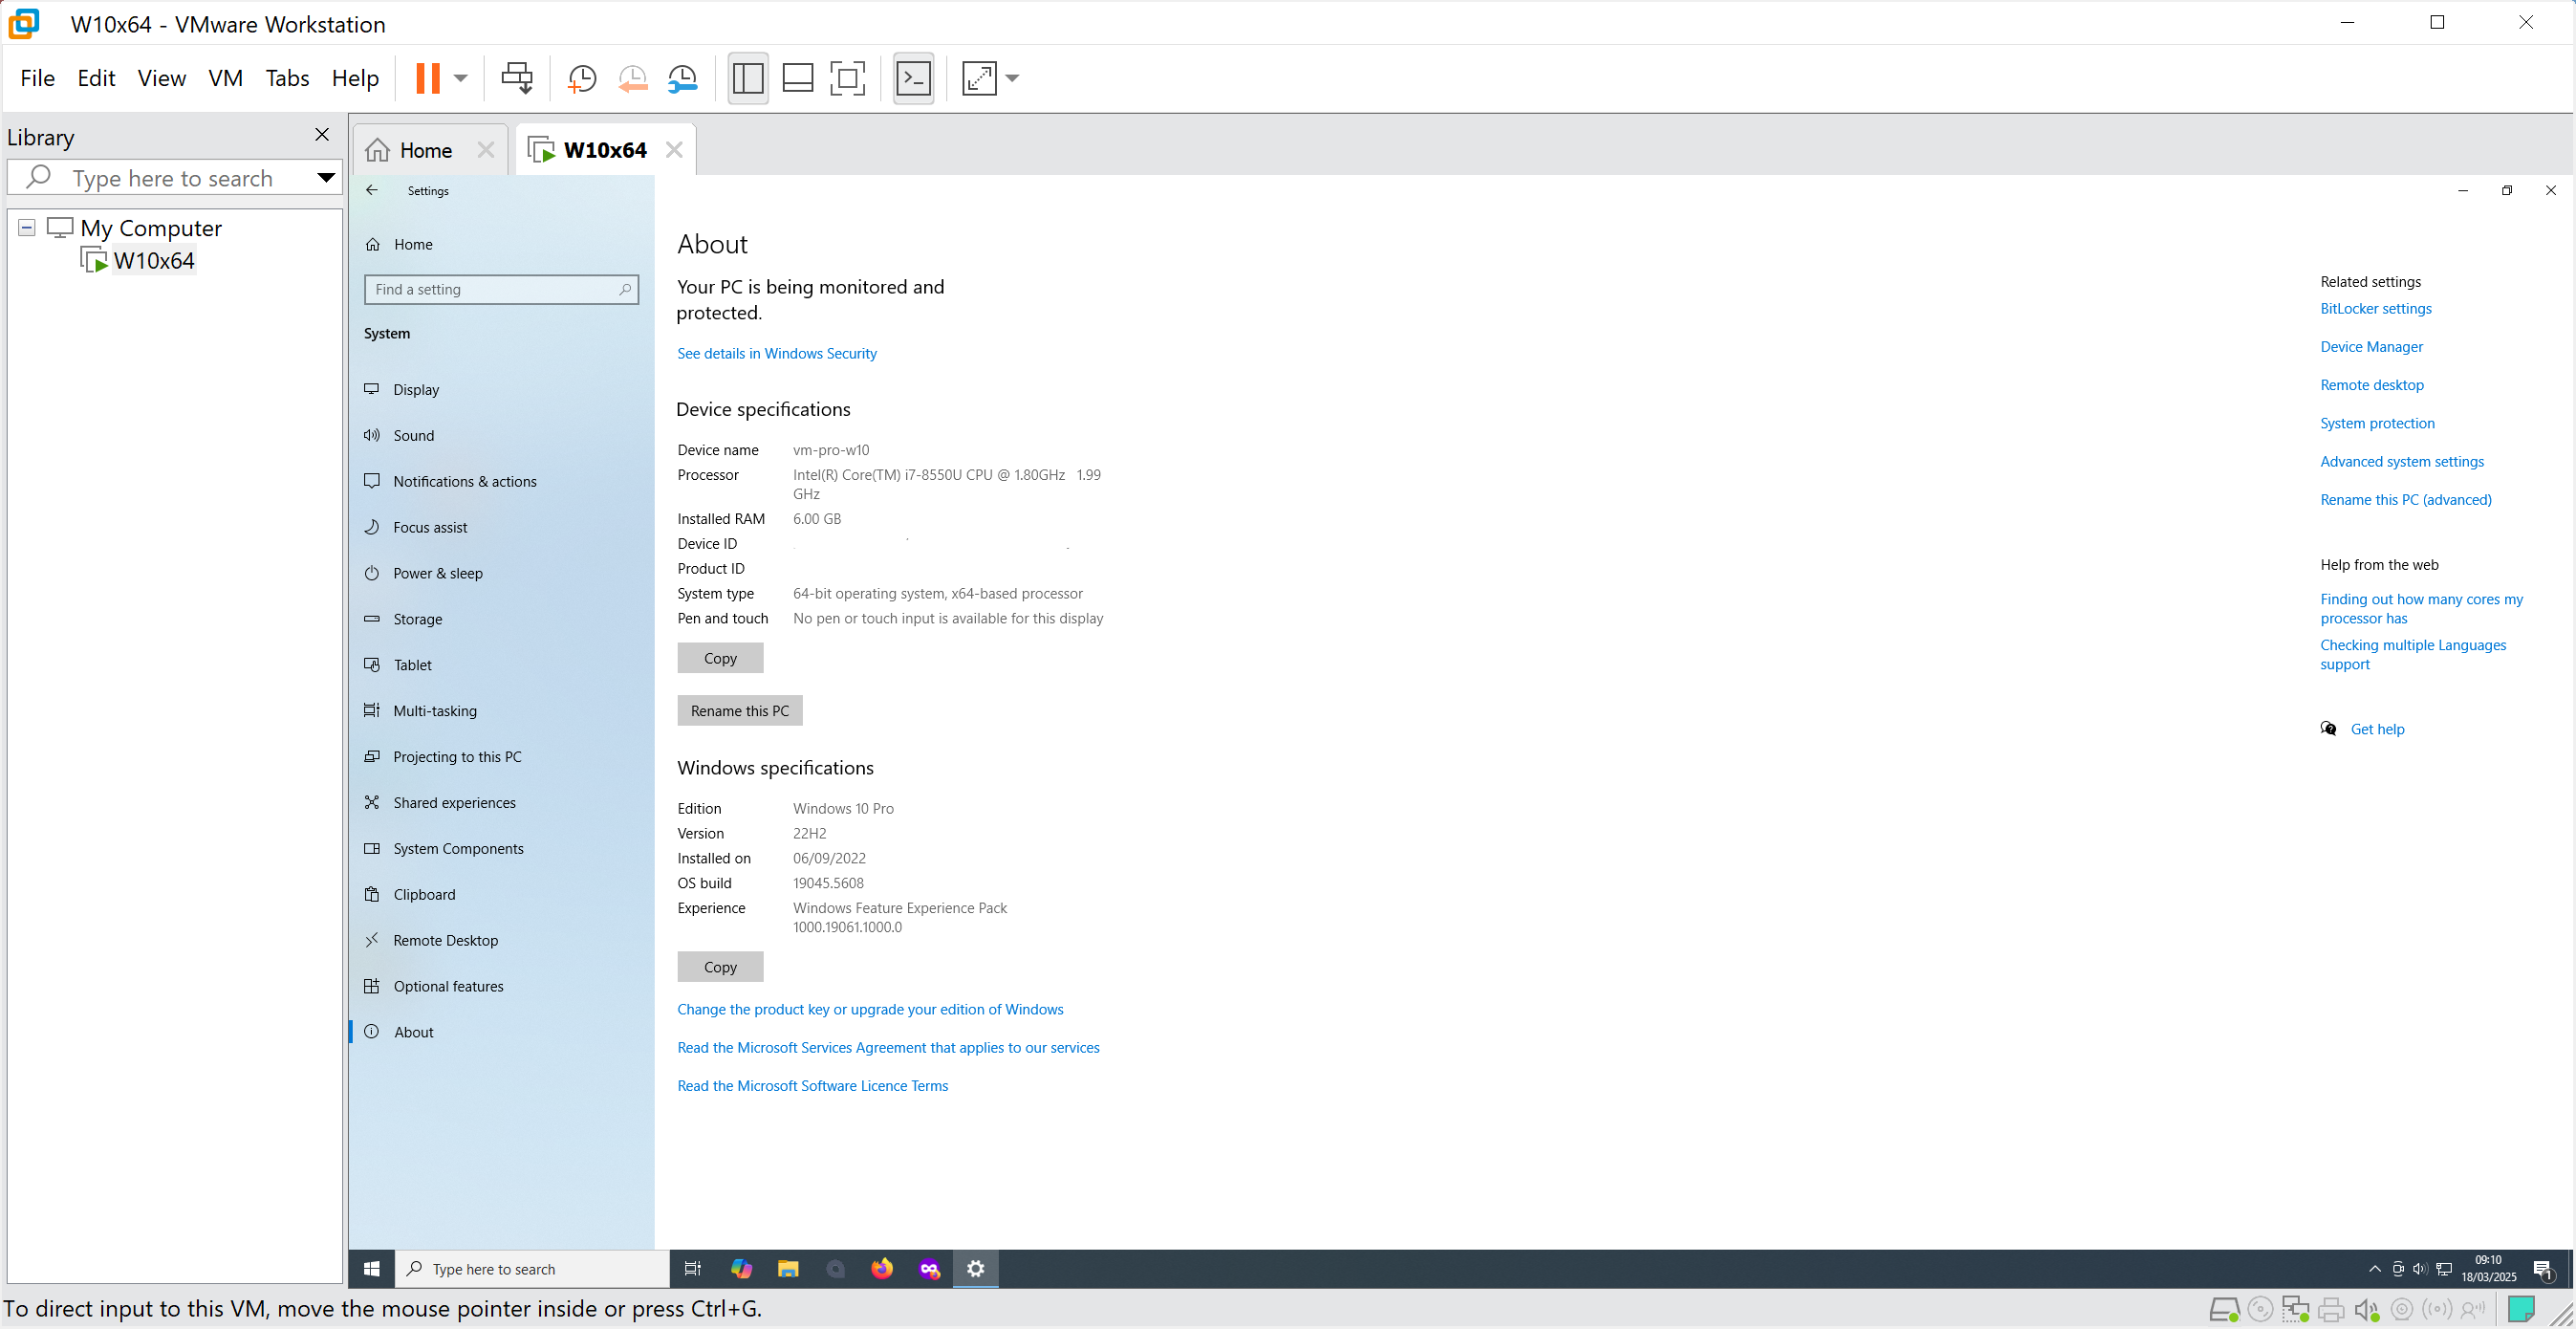
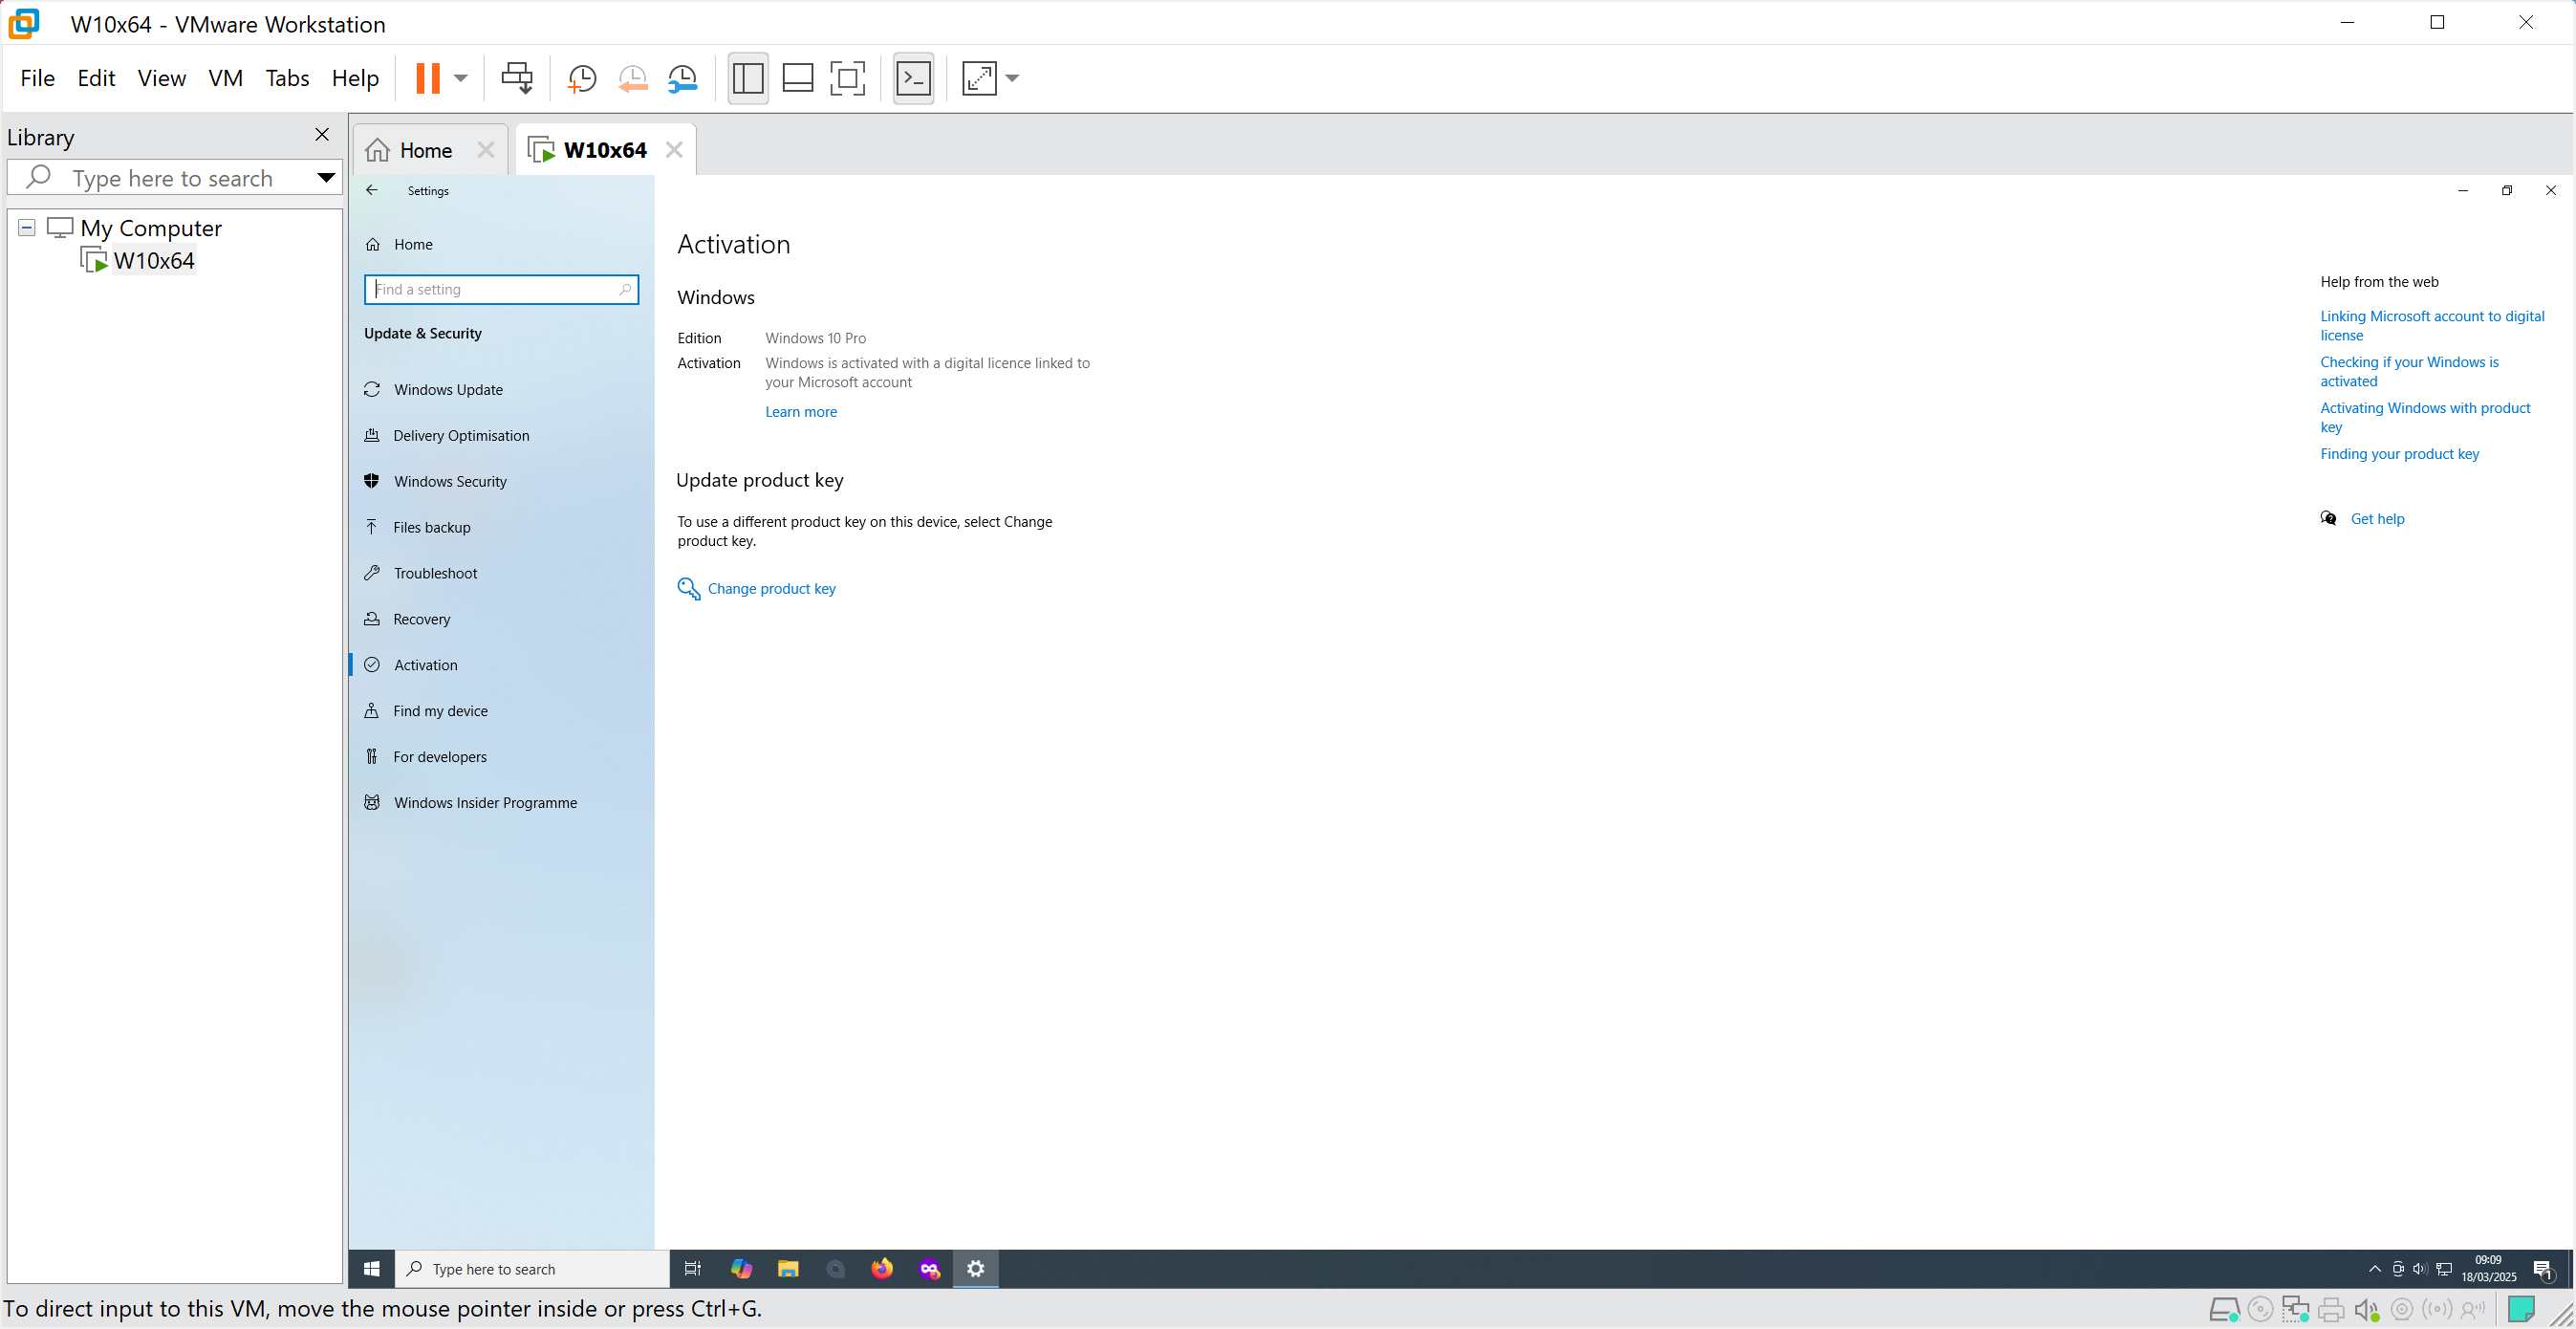
What happened to my Intel VMs?
This was my biggest concern going in, and it turned out to be a non-issue. VMware made Fusion and Workstation free for all users — commercial, personal, and educational — in late 2024, and that policy remains in place.
VMware Fusion and VMware Workstation are now free for all users — commercial, educational, and personal users alike.
Moving a VM from a Mac to a Windows PC is straightforward: copy the VMware bundle across, open it in Workstation, and answer "I moved it" when prompted. Windows reactivation is the only wrinkle — you'll need your product key, which you can retrieve from the destination machine's UEFI firmware if it was a licensed OEM install. See Find your Windows product key for the method.
2026 update: where does this leave Intel Mac users?
By 2026, the Intel Mac story is essentially in its final chapter. Apple silicon has been the default for several years, the performance and efficiency advantages are no longer debatable, and the software ecosystem has fully pivoted. Features like Apple Intelligence — Apple's on-device AI framework — are Apple silicon-only, and that list will only grow longer.
The Mac Mini (2018) is likely to be dropped from macOS support with the next major release, or the one after. Apple typically provides around seven years of OS support for Mac hardware, and the 2018 Mini is approaching that window. When it drops off the list, it won't be a surprise — it'll be the conclusion of a story that's been telegraphed for some time.
If you're still running one and it's working for you, Sonoma remains a solid, stable platform with continued security updates for now. But if it starts refusing updates the way mine did, treat it as the sign it probably is. The Apple silicon transition is complete. The water's warm.
For what it's worth, the Xserve 3,1 mentioned at the start of this saga is still sitting in a rack somewhere, patiently waiting. Some things outlast their era through sheer stubbornness. The 2018 Mac Mini, it turns out, is not one of them.
- Details

direnv lets you load and unload environment variables depending on the current directory. This is incredibly helpful for per-project isolated development environments or in DevOps for loading secrets for deployment of software builds reliably.
TL:DR – This is a shell extension, for Unix-like operating systems with a supported shell such as bash, zsh, and is easy to install and widely supported. Highly recommended.
- Details

Time Machine on macOS Tahoe remains one of the smartest habits any Mac user can build in 2026. Apple's built-in backup tool has matured considerably, but it still rewards those who understand how it works — and still punishes those who ignore it.
TL;DR — Time Machine offers incremental backups, version history, and full system recovery without any third-party subscription. macOS Tahoe brings refinements to the backup engine, but some long-standing quirks persist. Knowing how to set it up correctly, troubleshoot failures, and complement it with additional tools will keep your data genuinely safe.
What Time Machine actually does — and why it still matters
Time Machine is Apple's native backup solution, built into every Mac. It creates hourly snapshots of your files for the past 24 hours, daily backups for the past month, and weekly backups for as long as your drive has space. When storage runs short, it quietly discards the oldest backups to make room for new ones. The result is a rolling archive of your digital life that you can dip into at any point.
That granular history is the feature most people underestimate until they need it. Accidentally overwrote a document you spent a week on? Deleted a folder you assumed was safe? Time Machine lets you step back through time, file by file, and retrieve exactly what you lost. It also plays a central role when you migrate to a new Mac — Migration Assistant draws directly from a Time Machine backup to restore your apps, settings, and files to a fresh machine with minimal friction.
In an era where cloud storage is ubiquitous, it is tempting to assume that iCloud Drive or a similar service covers you. It does not, not fully. Cloud sync is not the same as a backup: if you delete a file and the deletion syncs before you notice, or ransomware encrypts your drive and the encrypted versions propagate upward, a local Time Machine archive is the thing that saves you. The two approaches complement each other; neither replaces the other.
Preparing for your first Time Machine backup
The most important decision you will make is choosing the right external drive. Apple recommends a drive at least as large as the storage used on your Mac, but in practice you want significantly more headroom — ideally two to three times your current usage — so that Time Machine can maintain a meaningful history rather than constantly pruning old backups to survive.
For most users in 2026, a USB-C or Thunderbolt external SSD offers the best balance of speed and reliability. Spinning hard drives are cheaper per gigabyte and still work perfectly well for Time Machine, but SSDs handle the frequent small writes of incremental backups more gracefully and are less vulnerable to the physical shocks that travel-prone drives endure. Prices for large-capacity portable SSDs have fallen considerably, making the upgrade easier to justify than it was even two years ago.
Formatting matters. Time Machine on macOS Tahoe supports both APFS and HFS+ (Mac OS Extended), but APFS is the right choice for any SSD. It handles snapshots more efficiently and aligns with how macOS itself manages storage. Open Disk Utility, erase the drive as APFS with a GUID Partition Map, and you are ready. Time Machine will also offer to format a freshly connected drive for you during setup — that shortcut is fine for most users.
Before you connect anything, spend a few minutes deciding what to exclude. System caches, virtual machine disk images, and large media libraries you already back up elsewhere are all good candidates for the exclusion list. Excluding them reduces backup duration, extends the life of your drive, and keeps the backup set focused on data you actually care about recovering.
Setting up Time Machine on macOS Tahoe


Open System Settings and search for "Time Machine" — it sits in the sidebar but the search shortcut is faster. Connect your formatted drive, click the plus button to add a backup destination, and select it. That is genuinely all that is required for a working setup. Time Machine will begin its first backup within the minute.
macOS Tahoe retains the backup frequency options introduced in recent releases: hourly (the default), daily, and weekly. Hourly is the right choice for most people. If you are on a laptop and frequently away from your backup drive, Time Machine will continue creating local snapshots to your internal drive in the meantime, then consolidate them to the external drive next time it is connected. Those local snapshots are transparent — you do not need to manage them manually.
Keep an eye on the Time Machine icon in the Menu Bar. It shows the progress of active backups and the timestamp of the last successful one. If that timestamp is more than 24 hours old and your drive has been connected, something needs attention. Catching that early is far better than discovering a months-long gap in your backup history at the worst possible moment.
macOS Tahoe has also improved how Time Machine handles network-attached storage. If you back up to a NAS device — a Synology or QNAP unit on your home network, for instance — the connection is more stable than in earlier releases, with fewer spurious "backup disk not available" alerts during periods of light network activity. For households with multiple Macs, a NAS-based Time Machine destination remains one of the most practical setups available.
Working through common Time Machine problems
Time Machine is reliable, but it is not infallible. The most common complaint is the dreaded "Backup Not Completed" notification, often accompanied by an error suggesting the backup disk could not be reached or that the backup itself is corrupted. Before assuming the worst, work through a short checklist.
First, check whether Spotlight is indexing your backup volume. If it is, exclude the Time Machine disk from Spotlight in System Settings under Siri & Spotlight. Spotlight indexing a live backup volume creates conflicts that can abort the backup process mid-run.
Second, consider whether local snapshots have accumulated to the point of causing issues. You can inspect and delete local snapshots from the Terminal using tmutil listlocalsnapshots / followed by tmutil deletelocalsnapshots [date] for any snapshot you want to remove. This is an edge case, but it comes up often enough to be worth knowing.
Third — and this is the fix that works more often than it should — remove the backup destination from Time Machine's settings and re-add it. This refreshes the permissions and connection metadata that Time Machine stores internally, and it resolves a surprising number of persistent errors without any deeper intervention.
If none of that helps, the most reliable solution is a new backup drive. Drives fail gradually and silently. A drive that passes a quick SMART check can still produce errors under the sustained write load of a Time Machine backup. Replacing the drive and starting a fresh backup set is not an admission of defeat — it is good housekeeping. Retiring your backup drive roughly once a year and keeping the old one as an archive is a habit worth building. When you genuinely need a backup, you want it to be on a drive you trust.
Alternatives and complements to Time Machine
Time Machine covers the vast majority of backup scenarios, but it works best as part of a broader strategy rather than a single point of reliance. The classic rule — three copies of your data, on two different media, with one offsite — is as relevant as ever.
For a second local backup, Carbon Copy Cloner remains the most capable third-party option on the Mac. It has adapted well to Apple Silicon and the security architecture of modern macOS, and its scheduled backup tasks and verification tools go beyond what Time Machine offers. One important caveat: creating a fully bootable clone of macOS is no longer straightforward due to the sealed system volume and security policies introduced in recent macOS releases. Carbon Copy Cloner handles this gracefully, but the resulting backup is best thought of as a data clone rather than a traditional bootable drive in the old sense. For most users that distinction does not matter — what you need in a crisis is your files and applications, and a CCC backup delivers both.
For offsite backup, cloud-based services that perform true versioned backups — rather than simple sync — provide the offsite leg of the three-two-one strategy without requiring you to physically move drives. These services run quietly in the background and restore individual files or entire systems through a web interface or dedicated app. Combined with Time Machine for fast local recovery and a periodic CCC clone for belt-and-braces assurance, you end up with a genuinely robust setup that can handle almost any failure scenario.
Keeping your backups healthy over time
Setting up Time Machine is the easy part. Maintaining it is where most people quietly fall behind. A backup you stopped checking six months ago may have been silently failing for five of those months — and you will only find out when you need it.
Build a monthly habit of opening Time Machine, confirming the last successful backup date, and spot-checking that you can browse and restore a recent file. It takes two minutes and eliminates the anxiety of uncertainty. While you are there, check the available space on your backup drive. When a Time Machine volume fills completely and begins pruning old backups aggressively, your historical window shrinks faster than you might expect.
Monitor the health of your backup drive using a SMART monitoring utility. Several good options exist in the Mac App Store and as standalone downloads. A drive showing reallocated sectors or rising error counts should be replaced promptly — not at your convenience, but now, before it fails during the one backup you genuinely need to restore from.
Data protection is not a task you complete once. It is an ongoing practice, and the effort involved is genuinely small compared to the alternative. Time Machine on macOS Tahoe is more capable and more stable than it has ever been. Use it, watch it, and back it up with at least one additional layer. The peace of mind is worth every bit of the modest effort required.
- Details

Installing Node.js on Ubuntu can be a convoluted process, particularly when it comes to managing multiple versions. Node Version Manager (NVM) provides a solution that allows developers to deal with versioning effectively. This guide offers a detailed, step-by-step walkthrough on installing Node.js via NVM on Ubuntu 22.04 LTS, ensuring that you maintain the latest Long Term Support (LTS) version of this essential runtime environment vital for backend services and real-time applications.
Node.js is an open-source JavaScript runtime that executes JavaScript code outside a web browser, predominantly used for building scalable network applications. However, various projects might require different versions. NVM addresses this issue seamlessly, allowing developers to switch between Node.js versions as required. Understanding the newer commands and installation steps is imperative in ensuring compatibility and maintaining best practices in development environments. Those looking to dive deeper into NVM can refer to its GitHub repository.
TL:DR – The installation of Node.js on Ubuntu via NVM includes prerequisites, step-by-step installation guidance, how to manage various Node.js versions effectively, and additional insights into best practices for development environments. Using NVM is highly recommended for developers who regularly update or switch node versions to maintain optimised functionality across projects. The version of Node installed by Ubuntu's package manager is woefully outdated so don't assume that will be ok.
- Details
Read more: Why You Should Install Node.js LTS on Ubuntu via NVM

Apple Notes has quietly become one of the most capable productivity tools on any platform. What started as a basic notepad has, by 2026, evolved into a feature-rich environment that rivals dedicated apps like Notion or Obsidian — without ever leaving the Apple ecosystem. With macOS Tahoe and the latest iOS releases, Notes has gained inline maths, audio transcription, smart folders, and richer text highlighting, making this the right moment to take a serious look at what the app can actually do. For an official walkthrough of every capability, the Apple Notes user guide is the definitive reference.
TL;DR — Apple Notes in 2026 is a genuine power tool. From Quick Notes and Smart Folders to inline maths calculations, live audio transcription, and real-time collaboration, the app rewards anyone willing to move beyond the basics. This guide covers the features that will actually change how you work.
{ToC}
Quick Notes feature
Quick Notes remains one of the most underused features in the Apple ecosystem. Accessible via the Control Centre, a hot corner on Mac, or directly from the lock screen on iPhone and iPad, it lets you capture a thought in seconds without breaking your flow. Notes created this way land automatically in the Quick Notes folder, ready to be filed, expanded, or linked to other notes later.
The context-awareness is particularly useful. Open a Quick Note while browsing Safari and the app embeds a link back to that page automatically. Return to that site later and a small Quick Note indicator appears, surfacing your annotation right when it's relevant. For researchers, writers, and anyone building a reference library, this alone is worth the habit.
On iPad with Apple Pencil, Quick Notes also accepts handwritten input immediately, so there's no friction between an idea and the page. Add images, links, or scanned documents in the same motion, and a Quick Note becomes a surprisingly complete record rather than just a placeholder.
Smart Folders and organisation
Smart Folders are one of the more powerful additions to Notes in recent releases, and they deserve more attention than they typically receive. Rather than manually sorting notes into folders, you define a set of rules — by tag, creation date, whether a note contains a checklist, a scan, or a specific attachment type — and Notes populates the folder automatically. Your notes file themselves.
This is especially useful for anyone managing a large archive. A Smart Folder for all notes tagged research created in the last 30 days, for instance, gives you a rolling view of recent work without any manual curation. Combine Smart Folders with consistent tagging and the result is an organisation system that scales without becoming a maintenance burden.
Standard folders and nested sub-folders still work exactly as before, so there's no obligation to rebuild your existing structure. Smart Folders layer on top of whatever system you already have, making them a low-risk upgrade for anyone who's been putting off a Notes reorganisation.
Inline maths and Maths Notes
One of the most genuinely surprising additions to Apple Notes is inline maths. Type a calculation anywhere in a note and add an equals sign — Notes solves it immediately, inline, without switching to a calculator or a separate app. It supports variables too, so you can define a value once and reference it throughout a note. Change the variable and every dependent calculation updates automatically.
For anyone doing rough financial modelling, unit conversions, or quick project estimates, this changes the texture of working in Notes considerably. A note about a home renovation budget, for example, can carry live calculations alongside the written plan, keeping numbers and context together rather than scattered across different apps.
Notes also integrates with the Calculator app through Maths Notes, which opens a dedicated calculation environment directly within Notes. This bridges the gap between a scratchpad and a proper working document, and it's the kind of feature that, once you've used it, makes other note-taking apps feel incomplete.
Advanced formatting tools
Formatting in Apple Notes has matured well beyond basic bold and italic. Headers, body text, monospaced code formatting, bullet lists, numbered lists, and checklists are all available from the format bar, and the hierarchy they create makes long notes genuinely navigable rather than a wall of text.
The addition of a dedicated highlight style means you can now colour-code text directly in Notes — useful for marking key passages, flagging items for review, or simply creating visual structure in dense material. It's a small change that makes a meaningful difference when you're reviewing notes you wrote weeks ago.
Hyperlinks between notes give Apple Notes something close to a personal wiki. Link a project overview note to individual task notes, meeting records, or reference documents, and you build a connected knowledge base rather than a collection of isolated entries. The structure you create is entirely up to you, which makes it adaptable to everything from academic research to product management.
Audio recording and transcription
Apple Notes on Mac and iPhone now supports recording audio directly within a note, and the transcript is generated automatically and made fully searchable. This is a significant capability. Record a meeting, a lecture, or a voice memo and the words become findable text — no third-party transcription service required, no export step, no additional cost.
The transcript sits alongside the audio recording in the note, so you can read through the text while the audio plays, or search for a specific phrase and jump straight to that moment. For journalists, students, researchers, or anyone who conducts interviews, this removes a meaningful amount of friction from the capture-to-review workflow.
Combined with the existing support for embedding photos, videos, and scanned documents, the audio transcription feature completes a media integration picture that makes Apple Notes a credible single-location archive for almost any kind of project material.
Document scanning and OCR
The document scanning capability in Apple Notes remains one of its most practical features for day-to-day use. Point your camera at a physical document and the app detects the edges, corrects the perspective, and adjusts the exposure — the result is a clean, legible scan in a few seconds, with no additional hardware or scanning app needed.
Optical Character Recognition means the text within those scans is fully searchable. Scan a business card, a receipt, a handwritten page, or a printed contract and the content becomes part of your searchable Notes library. This is particularly useful for going paperless incrementally — scan documents as they arrive rather than committing to a dedicated scanning workflow.
Handwritten notes are also indexed for search, so notes made with Apple Pencil on iPad are just as retrievable as typed ones. The practical effect is that your entire Notes library — typed, scanned, handwritten — behaves as a single searchable archive.
Collaboration and sharing
Sharing a note or an entire folder in Apple Notes takes a few taps, and the permission model is straightforward: grant editing access or view-only access, and revoke it at any time. Collaborators see updates in real time, and the edit history means you can trace changes and restore earlier versions if a note drifts in the wrong direction.
Shared folders work well for team projects, event planning, or any situation where a group needs access to a common set of materials. Everyone with access sees the same folder, updated live, without needing to share individual notes one at a time. It's a practical alternative to more complex project management tools for teams whose needs don't justify the overhead.
The collaboration features work across iPhone, iPad, and Mac, and participants don't need to be on the same device or in the same location. For small teams already embedded in the Apple ecosystem, Notes collaboration is often the path of least resistance — and in 2026, it's polished enough to be a genuine first choice rather than a fallback.
Enhanced search functionality
Search in Apple Notes is more capable than most users realise. Beyond keyword matching, you can filter by media type, note type, date range, and whether a note contains checklists, scans, drawings, or audio. The result is a targeted retrieval system rather than a simple text search.
Spotlight integration means you don't need to open Notes at all to find something — a search from your Mac desktop or iPhone home screen surfaces Notes content directly, including text from scanned documents and handwritten notes. For anyone with a large archive, this is the feature that makes Notes scale.
Tags add another retrieval layer. Apply tags consistently and you can pull up every note related to a topic, project, or context instantly — and combine that with Smart Folders to keep those results permanently surfaced without repeating the search. It's a system that rewards a small amount of upfront discipline with a significant long-term payoff.
Privacy and security
Individual notes can be locked behind Face ID, Touch ID, or a passcode, keeping sensitive content private even on a shared or unlocked device. The lock applies at the note level, so you can secure only what needs securing without restricting access to the rest of your library.
iCloud sync keeps Notes consistent across every Apple device on your account — iPhone, iPad, Mac, and accessible via iCloud.com on any browser. Changes made on one device appear on all others promptly, and the data is encrypted both in transit and at rest. For most users, this is sufficient; for those with stricter requirements, on-device-only storage remains an option by disabling iCloud Notes sync.
It's worth noting that Apple's approach to privacy across its ecosystem means Notes data is not used for advertising or shared with third parties — a meaningful distinction from some competing productivity platforms.
Tables and checklists
Tables in Apple Notes are more flexible than they first appear. Add rows and columns, reorder them by dragging, and the table adjusts cleanly without the formatting headaches that plague word processors. For tracking project status, comparing options, or laying out any structured data, a Notes table is often faster to build and easier to maintain than a spreadsheet for simple use cases.
Checklists remain one of the most-used features in the app for good reason. Tick items off as you complete them, reorder tasks by dragging, and move completed items to the bottom automatically to keep active tasks prominent. For daily task lists, packing lists, meeting agendas, or project milestones, the checklist format is quick to create and satisfying to work through.
The combination of tables, checklists, inline maths, and Smart Folders means Apple Notes can now handle a range of structured work that previously required a dedicated task manager or spreadsheet. It won't replace specialised tools for complex projects, but for a large proportion of everyday organisation tasks, it's more than sufficient.
Sketching and drawing tools
The drawing tools in Apple Notes support a range of brush styles, colours, and stroke weights, and on iPad with Apple Pencil the experience is natural enough to replace a physical sketchbook for quick diagrams, wireframes, or annotated images. On iPhone, finger drawing works well for rough sketches and annotations.
Annotating images directly within a note is particularly useful for design feedback, technical documentation, or any situation where a marked-up visual communicates more clearly than text. Draw arrows, highlight areas, add labels — the annotation stays embedded in the note alongside whatever context surrounds it.
Handwritten input can be converted to typed text, which means a note started on paper-like iPad can become a searchable, shareable typed document without any retyping. The conversion is accurate enough for everyday use, and the option to keep the handwritten version means you're not forced to choose between the two formats.
Attachments and app integration
Apple Notes accepts attachments from across the Apple ecosystem with minimal friction. Share a PDF from Files, an image from Photos, a link from Safari, or a document from Pages — everything lands in the note in a few taps. The share sheet in any Apple app treats Notes as a first-class destination, which makes it easy to pull together research or project materials from wherever they originate.
Notes widgets on iPhone, iPad, and Mac give you at-a-glance access to pinned notes or recent entries without opening the app. Pin a note you're actively working from — a meeting agenda, a shopping list, a project checklist — and it stays visible on your home screen or desktop throughout the day.
The integration with the broader Apple ecosystem, from Siri to Shortcuts to the Calculator app's Maths Notes, means Apple Notes increasingly functions as a connective layer between your tools rather than a standalone app. That shift in role — from isolated notepad to active workspace — is what makes it worth investing time in the features that go beyond the basics.
Final thoughts
Apple Notes in 2026 is a different proposition from the app it was even two or three years ago. Inline maths, audio transcription, Smart Folders, colour highlights, and deeper ecosystem integration have moved it into territory that once required third-party apps. The fundamentals — fast capture, reliable sync, clean search — remain as solid as ever, and the new capabilities layer on top without adding complexity for users who don't need them.
The most effective approach is incremental. Pick one or two features from this guide that address a genuine friction point in your current workflow — Smart Folders if your archive is hard to navigate, inline maths if you're constantly switching to a calculator, audio transcription if you take a lot of meetings — and build from there. The app rewards exploration without demanding it.
Whether you're a student, a creative professional, or someone managing a complex workload, Apple Notes now has the depth to support serious work. The tools are there. The question is how far you want to take them.
- Details

In 2026, Apple's MacBook lineup has never been more capable — or more nuanced. With M4 MacBooks now sitting alongside the newer M5 MacBook Pro, the question of which model to buy has become more layered than ever. Whether you're a student weighing up your first serious laptop, a creative professional demanding sustained performance, or a business user hunting for the best value, the right answer depends heavily on your specific priorities. This article cuts through the noise, comparing the M4 MacBook Air and M4 MacBook Pro across design, display, performance, battery, audio, connectivity, and price — and flagging where the M5 generation changes the calculus.
TL;DR — The M4 MacBook Air remains the sweet spot for most people: light, quiet, affordable, and genuinely powerful for everyday work. The M4 MacBook Pro steps up with a superior display, active cooling, more ports, and longer battery life for professionals who need sustained heavy lifting. And if you're open to spending a little more, the M5 MacBook Pro 14-inch is now available — including through Apple's own refurbished store at meaningfully reduced prices. Whichever model you choose, expect five to six years of full software support, and a few more beyond that with sensible care.
{ToC}
Where things stand in 2026
Apple's silicon roadmap has moved quickly. The M4 generation — launched across the MacBook Air 13-inch, MacBook Air 15-inch, and MacBook Pro 14-inch and 16-inch — represented a substantial leap over the M3 family in both CPU throughput and neural engine performance. More recently, Apple has introduced the M5 chip in the MacBook Pro line, and M5 MacBook Pro 14-inch units are already appearing in Apple's UK refurbished store, signalling that the M5 Pro generation is well underway. For most buyers, the M4 MacBook Air still makes excellent sense — but professionals considering a MacBook Pro should now weigh the M4 Pro against the newer M5 baseline model before committing.
Refurbished pricing through Apple's own store has also made premium hardware more accessible. Certified refurbished M4 MacBook Air 15-inch models start from around £929 in the UK, while refurbished M4 Pro MacBook Pro 14-inch units are available from approximately £1,699 — and refurbished M5 MacBook Pro 14-inch models from around £1,359. These are Apple-certified units with full warranties, and they represent genuine value if you're comfortable buying refurbished.
Design and portability
The M4 MacBook Air continues to set the standard for portable laptop design. Fanless, slim, and weighing just 1.24 kg (2.7 pounds) in the 13-inch configuration, it disappears into a bag without a second thought. Colour options — Sky Blue, Silver, Starlight, and Midnight — give it a personality that few Windows competitors can match at a similar price. The 15-inch Air adds screen real estate while keeping the same fanless architecture and broadly similar weight profile, making it a compelling option for those who want more display without jumping to Pro pricing.
The M4 MacBook Pro 14-inch is a different proposition: heavier at 1.55 kg (3.4 pounds), with a more purposeful chassis and an active cooling system. It doesn't feel overbuilt — Apple's industrial design remains excellent — but it communicates that it's here to work rather than to travel light. For desk-anchored professionals who occasionally take their machine to meetings or client sites, the trade-off is entirely reasonable.
The practical question is an honest one: how often are you genuinely mobile? If you move between locations several times a day — lectures, meetings, coffee shops — the Air's lightness pays dividends every single time. If your laptop mostly lives on a desk and travels occasionally, the Pro's extra weight is barely a consideration.
Display quality
This is where the gap between the two lines is most immediately visible. The M4 MacBook Air's Liquid Retina display is excellent for its class — sharp, colour-accurate, and comfortable for long working sessions. It does the job well for productivity, streaming, and casual creative work. The MacBook Pro's Liquid Retina XDR panel, however, operates in a different tier: higher peak brightness, vastly improved contrast, and ProMotion adaptive refresh up to 120Hz. If you work with photography, video, or motion graphics, the Pro's display isn't a luxury — it's a functional tool.
Display comparison: M4 MacBook Air 13-inch vs M4 MacBook Pro 14-inch
| MacBook Air 13-in. (M4) | MacBook Pro 14-in. (M4) |
|---|---|
| 13.6-inch Liquid Retina display | 14.2-inch mini-LED Liquid Retina XDR display |
| 2560×1664 resolution | 3024×1964 resolution |
| 500 nits sustained brightness | 1,000 nits sustained / 1,600 nits peak (HDR content) |
| Up to 1,000 nits outdoor brightness (SDR) | Up to 1,000 nits outdoor brightness (SDR) |
| Wide colour (P3) | |
| True Tone technology | |
| Fixed 60Hz refresh rate | ProMotion adaptive refresh up to 120Hz |
The 120Hz ProMotion display on the Pro also benefits everyday use beyond video work — scrolling feels noticeably smoother, and UI animations are crisper. It's the kind of difference that's hard to articulate until you've used it, and harder still to go back from. The Pro also supports more flexible external display configurations, which matters for anyone running a multi-monitor studio setup.
Performance and cooling
Both machines carry Apple silicon that would have seemed extraordinary just a few years ago — the M4 chip handles the vast majority of professional workloads with ease, and the gap between Apple's laptops and the Intel-era machines they replaced remains striking. For everyday tasks — writing, browsing, video calls, even light photo editing — the M4 MacBook Air is more than sufficient, and its fanless design means it operates in complete silence regardless of what you throw at it.
The meaningful difference emerges under sustained load. Without active cooling, the Air manages heat passively, which means it will throttle performance during extended intensive tasks — long video renders, large Xcode builds, machine learning workloads. For occasional bursts of heavy work this is rarely noticeable, but for users who spend hours in compute-intensive applications, it becomes a real constraint.
The MacBook Pro's active cooling system removes that ceiling. It sustains peak performance indefinitely, making it the right tool for video editors, developers working with large codebases, 3D artists, and anyone whose workflow involves prolonged heavy computation. The M4 Pro chip available in the higher-tier MacBook Pro configurations extends this further, with a 12-core CPU and 16-core GPU that handle professional creative work at a level the base M4 simply cannot match over time.
It's also worth noting that the M5 MacBook Pro 14-inch is now available, including in Apple's refurbished store. The M5 represents Apple's next architectural step, and for buyers planning to hold their machine for five or more years — which, given Apple's support track record, is entirely realistic — the newer silicon offers additional headroom. The refurbished pricing makes this option more accessible than many expect.
Battery life
Battery life is genuinely excellent across both lines, to the point where it's rarely a deciding factor. Apple rates the M4 MacBook Air at up to 18 hours and the M4 MacBook Pro at up to 24 hours — and while real-world figures vary with screen brightness, workload, and connectivity, both machines comfortably last a full working day without needing a charger nearby.
For most users, the Air's battery performance is exceptional. If you're a road warrior who spends long days away from power — back-to-back flights, full-day conferences, extended travel — the Pro's additional endurance is a genuine asset. But for the majority of working patterns, the Air holds up without issue.
Audio
The MacBook Pro's speaker system is meaningfully better than the Air's — richer bass, greater clarity, and higher maximum volume. For casual use, video calls, and background music, the Air performs well. For users who work with audio — musicians, podcast producers, video editors mixing sound — the Pro's speaker quality provides a more reliable reference point and a more immersive listening experience overall. It won't replace dedicated studio monitors, but it reduces the gap considerably.
Connectivity
The M4 MacBook Air includes two Thunderbolt / USB 4 ports and a MagSafe charging port, which covers most everyday needs. Add a quality hub or docking station and you can expand connectivity significantly — this is a practical solution for most users and keeps the Air's slim profile intact.
The MacBook Pro goes further out of the box: additional Thunderbolt ports, a full-size HDMI port, and an upgraded SD card slot. For photographers importing directly from camera cards, videographers connecting to external monitors and drives simultaneously, or developers running multiple displays without adapters, this built-in versatility is a real convenience. If your workflow involves frequent peripheral juggling, the Pro's port selection saves both money and desk clutter.
Pricing and value
New M4 MacBook Air pricing positions it as one of the most capable laptops available at its price point — the 13-inch model remains the more affordable entry, with the 15-inch commanding a premium for the larger screen. The M4 MacBook Pro 14-inch sits at a higher price tier, reflecting its display, cooling, and connectivity advantages, while M4 Pro configurations step up further for those needing the additional GPU and CPU cores.
Apple's refurbished store has become an increasingly compelling route for buyers who want certified hardware at reduced prices. In the UK, refurbished M4 MacBook Air 15-inch models are currently available from around £929 (down from £1,099 new), refurbished M4 Pro MacBook Pro 14-inch units from approximately £1,699 (down from £1,999), and — notably — refurbished M5 MacBook Pro 14-inch models from around £1,359. All Apple refurbished products come with a one-year warranty and have been tested to the same standard as new units. For budget-conscious buyers who don't need the latest silicon on day one, this is a route worth exploring seriously.
The broad value equation hasn't changed: the Air delivers outstanding performance per pound for most users, and the Pro justifies its premium for those whose work genuinely demands it. Where things have shifted is that the M5 MacBook Pro — previously out of reach for many — is now available refurbished at prices that bring it into realistic consideration for more buyers.
Which model should you buy?
For students, writers, general professionals, and anyone whose heaviest regular task is video streaming or light photo editing, the M4 MacBook Air is the clear answer. It's light, silent, beautiful to use, and will handle everything you ask of it for years to come. The 13-inch suits those who prioritise portability; the 15-inch is worth the extra spend if you work primarily from a desk or prefer more screen space without buying a separate monitor.
For video editors, developers, audio producers, photographers, and anyone running sustained compute-intensive workloads, the MacBook Pro earns its price. The display alone is a compelling argument for creative professionals, and the active cooling means you're never waiting for your machine to catch its breath. If you're in this camp and considering a new purchase, it's worth checking whether the M5 MacBook Pro — now available refurbished — fits your budget before defaulting to the M4 Pro.
If you're buying with personal funds, the MacBook Air almost certainly represents the better value. If the purchase is going through a business or corporate budget, the MacBook Pro's longevity and capability make it the easier choice to justify — and the one you're less likely to outgrow.
Whichever route you take, Apple's current MacBook lineup represents some of the best laptop hardware available in 2026. The harder decision isn't Mac versus anything else — it's working out which Mac is the right fit for how you actually work.
- Details

In the quest for a capable yet affordable laptop in 2026, refurbished MacBook Air models represent one of the strongest value propositions in the UK market. With Apple now selling the M4 MacBook Air as its current generation, the refurbished market for M2, M3, and even M4 models has matured considerably — offering genuine savings, solid warranties, and hardware that will remain relevant for years to come. This article explores where to buy, what to look for, and how to get the best deal.
The refurbished laptop market has grown substantially, driven by cost pressures, environmental awareness, and a growing consumer confidence in certified pre-owned technology. Apple's own UK refurbished store now lists M4 MacBook Air models at meaningful discounts from their original retail prices, while retailers such as John Lewis and Computer Exchange continue to stock M2 and M3 variants for buyers seeking even greater savings. If you're weighing up your options, read on for a clear-eyed guide to navigating the refurbished MacBook Air landscape right now.
TL;DR — Refurbished MacBook Air models, from the M2 through to the M4, offer reliable performance at significantly reduced prices when purchased from reputable UK sellers. With Apple's own refurbished store now listing M4 models, and M2 and M3 units available at lower price points elsewhere, there has never been a better time to buy refurbished. Prioritise at least 16GB RAM and 512GB storage, and always buy from a seller with a meaningful warranty.
The current MacBook Air landscape in 2026
Apple's MacBook Air line has settled into a clear generational hierarchy. The M4 is the current chip powering new MacBook Air models, and it now also appears in Apple's own UK refurbished store — a significant development that effectively legitimises the M4 as a refurbished option for the first time. Entry-level refurbished M4 MacBook Air configurations start from £929, reduced from £1,099, representing a saving of £170 direct from Apple. Mid-range and higher configurations offer savings of £180 and £210 respectively, bringing those models to £1,019 and £1,189.
For buyers who don't need the absolute latest silicon, refurbished M2 and M3 MacBook Air units are available at lower price points still, making the overall range genuinely broad. The M2 arrived in 2022, the M3 in early 2024, and all three generations remain capable, well-supported machines. Apple continues to push macOS updates to M-series chips, so none of these models are approaching obsolescence. The question is simply how much performance you need and how much you want to spend.
Understanding the MacBook Air M2, M3, and M4 features
The MacBook Air M2 brought a redesigned chassis, a Liquid Retina display, a 1080p FaceTime HD camera, and the return of MagSafe charging — all meaningful upgrades over the original M1 design. It remains a genuinely capable machine for the vast majority of everyday and professional tasks, and its maturity in the refurbished market means pricing is now very competitive.
The M3 MacBook Air, released in early 2024, refined the formula further. It added faster Wi-Fi connectivity, support for two external displays simultaneously — a feature that had frustrated M2 owners — and improved microphone modes that make a noticeable difference on video calls. For anyone who regularly works across multiple screens, the M3 is worth the modest premium over an M2 in the refurbished market.
The M4 MacBook Air, Apple's current model, brings further performance headroom, improved efficiency, and is now available in Sky Blue, Silver, Starlight, and Midnight finishes. Its arrival in Apple's refurbished store means buyers can now access a certified, warranty-backed M4 machine at a genuine discount — something that simply wasn't possible twelve months ago. For buyers who want the latest generation with Apple's full refurbishment guarantee, this is a compelling development.
Across all three generations, the core MacBook Air proposition remains the same: a fanless, thin, light machine that handles everything from document editing and web browsing to photo editing and light video work without complaint. The differences between generations are real but incremental; the right choice depends on your budget and specific requirements rather than any urgent need to own the newest chip.
The advantages of purchasing refurbished
The financial case for buying refurbished is straightforward. A refurbished M4 MacBook Air from Apple's own store costs meaningfully less than its new equivalent, and M2 and M3 models are available at lower prices still. The savings are most pronounced immediately after a new generation launches — which is precisely where we are now with the M4 established as the current model. Refurbished M2 and M3 stock is plentiful, and sellers are motivated to move it.
Reputable vendors test and refurbish devices to defined standards and back them with warranties, so the risk profile is far lower than buying from a private seller. Apple's certified refurbished products are, in the company's own words, indistinguishable from new — they arrive in new packaging with new batteries and outer shells, and come with Apple's standard warranty. John Lewis backs its refurbished devices with two-year warranties, and Computer Exchange does the same.
The environmental argument is equally compelling. Choosing a refurbished MacBook Air extends the working life of a high-quality product, reduces electronic waste, and supports a circular economy. For buyers who want premium technology without the environmental cost of manufacturing a brand new device, refurbished is the more responsible choice.
Specifications and memory options
Regardless of which generation you're considering, the specification advice is consistent: do not buy a MacBook Air with less than 16GB of unified memory. Applications have grown hungrier, browser tabs accumulate, and 8GB configurations show their limits under any kind of real workload. More importantly, you cannot upgrade the memory after purchase — what you buy is what you keep — so getting this right at the point of purchase matters.
For storage, 512GB is the sensible minimum. It is easy to underestimate how quickly local storage fills up, particularly if you work with photos, video, or large project files. The jump from 256GB to 512GB adds cost, but it is a cost worth paying. Models with 1TB or 2TB storage command a significant premium in the refurbished market, but for users with genuinely large storage needs, they remain worth considering.
The sweet spot for most buyers is a 16GB RAM, 512GB SSD configuration — available across M2, M3, and now M4 refurbished models. This combination handles demanding workloads comfortably and holds its resale value well. If your budget stretches to 24GB RAM, the additional headroom is welcome for creative professionals, but for everyday and office use, 16GB is sufficient.
Where to buy refurbished MacBook Air in the UK
There are four main routes to a refurbished MacBook Air in the UK, each with distinct advantages.
- Apple UK Refurbished Store — The gold standard. Apple's certified refurbished MacBook Air models now include M4 configurations, starting from £929. Every device is fully tested, comes with a new battery and outer shell, includes all accessories, and is backed by Apple's one-year warranty with the option to add AppleCare+. The selection changes frequently as stock is updated.
- John Lewis — A reliable high-street option with strong consumer protections. John Lewis backs refurbished devices with a two-year warranty, and its customer service reputation is well established. Pricing sits between Apple's refurbished store and the secondary market.
- Computer Exchange (CeX) — The most affordable route, and one that covers a wide range of specifications and conditions. CeX backs everything it sells with a two-year warranty, which is reassuring given the lower price points. Condition grading is clearly described, and the range of available configurations is broad. For buyers comfortable with a more worn exterior in exchange for a lower price, CeX is hard to beat.
- Amazon Renewed — Amazon's refurbished programme lists MacBook Air models from a range of third-party sellers. Quality and warranty terms vary by seller, so scrutinising individual listings carefully is essential. Stick to sellers with strong review scores and clear warranty commitments.
Financing options
Spreading the cost of a refurbished MacBook Air is possible through several routes. Apple offers financing on its refurbished store purchases, and John Lewis provides credit options at point of sale. Before committing to any finance arrangement, it is worth doing the arithmetic carefully: interest charges can erode the savings that made the refurbished route attractive in the first place. A zero-percent or low-interest arrangement over a short term can make sense; a high-APR credit card stretched over many months is harder to justify. Buy now, pay later services are widely available but carry their own risks if payments are missed. Approach financing as a tool for managing cash flow rather than a way to afford something beyond your budget.
Buying considerations and warranty information
Before completing any purchase, confirm the warranty terms in writing. Apple's certified refurbished products come with a one-year warranty; John Lewis and Computer Exchange both offer two years. Warranty length matters, but so does the quality of the support behind it — a warranty is only as good as the vendor's willingness to honour it promptly and without friction.
Return policies deserve equal attention. A vendor who offers a meaningful return window allows you to assess the device properly before committing. Apple's refurbished store, John Lewis, and CeX all have defined return policies; read them before purchasing rather than after a problem arises.
Condition grading varies between vendors. Apple's refurbished products are cosmetically near-new; CeX grades its stock from A (excellent) downward, with pricing reflecting condition. For most buyers, a grade-A or equivalent condition is worth the small premium over a heavily worn unit, particularly if you plan to resell in future.
The importance of reviews and customer service
Consumer reviews remain one of the most reliable signals of vendor quality. Before purchasing from any seller — particularly on Amazon or through smaller online retailers — check recent reviews specifically for the refurbished MacBook Air category rather than the vendor's overall rating. Issues with refurbished stock can differ markedly from issues with new goods.
Customer service quality becomes most apparent when something goes wrong. Apple and John Lewis sit at the premium end of the support spectrum; Computer Exchange offers a more transactional experience but has generally solid processes for warranty claims. Whichever vendor you choose, knowing how to contact support and what the escalation process looks like before you need it is time well spent.
Legal considerations when buying refurbished
UK consumer law provides meaningful protections for refurbished purchases. Under the Consumer Rights Act, goods must be of satisfactory quality, fit for purpose, and as described — and this applies to refurbished products as much as new ones. If a device develops a fault within the first six months, the burden of proof is on the seller to demonstrate it was not present at the time of sale. Beyond six months, the burden shifts, but your rights do not disappear.
Electronic waste legislation places obligations on vendors to handle end-of-life devices responsibly. Buying refurbished is itself a contribution to reducing e-waste, but it is worth choosing vendors who demonstrate broader environmental responsibility — whether through recycling programmes, sustainable packaging, or transparent supply chains.
Making the informed choice
The refurbished MacBook Air market in 2026 offers more choice at better prices than at any previous point. The arrival of M4 models in Apple's own refurbished store raises the ceiling of what is available certified and warranted, while continued availability of M2 and M3 stock keeps the entry price accessible. All three generations are capable, well-supported machines that will receive macOS updates for years ahead.
The practical advice is simple: decide on your budget, prioritise 16GB RAM and 512GB storage, and buy from a vendor whose warranty and return policy you have read and understood. Whether you opt for Apple's refurbished store for maximum assurance, John Lewis for high-street convenience, or Computer Exchange for the keenest pricing, the refurbished route offers a sound way to own premium Apple hardware without paying a premium price.
- Details