Overview of Android Auto and its functionality
Android Auto connects your smartphone to your car's infotainment system, offering a simplified, distraction-free interface for navigation, communication, and entertainment. By projecting essential apps onto your car's display, it ensures drivers can access what they need without compromising safety.
Why taking screenshots with Android Auto is useful
Capturing screenshots in Android Auto is crucial for developers, testers, and designers. Screenshots help document app interfaces, debug issues, and share designs or workflows with teams. Whether for refining an application or creating tutorials, taking screenshots streamlines many processes.
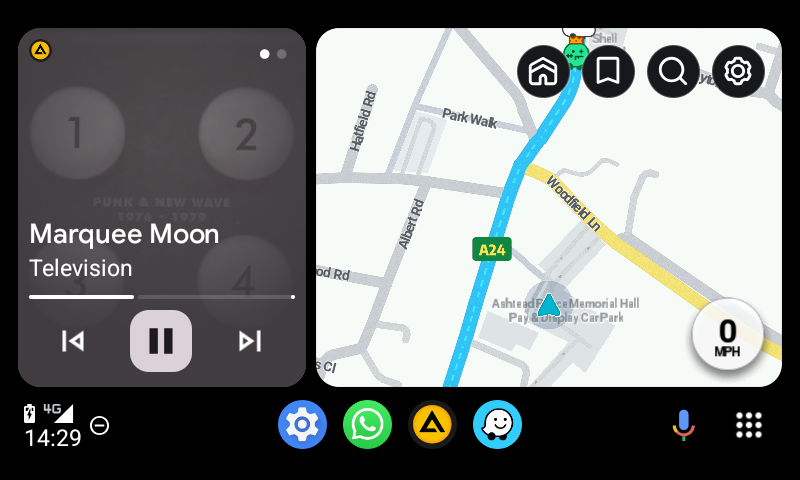
TL:DR – The taking of a screenshot of the infotainment screen is harder than an ordinary screenshot. To me it is a two person operation because passengers should do this as its too distracting for drivers!
Contents
- Overview of Android Auto and its functionality
- Why taking screenshots with Android Auto is useful
- Key challenges and limitations in capturing screenshots
- What is developer mode in Android Auto
- Benefits of enabling developer mode for screenshots
- Risks and precautions when using developer mode
- Preparing to Take Screenshots
- Prerequisites for capturing screenshots on Android Auto
- Tools and software required for the process
- Ensuring your device and system are properly configured
- Enabling Developer Mode on Android Auto
- Step-by-step guide to activating developer mode
- Troubleshooting issues when enabling developer mode
- Verifying that developer mode is active
- Taking Screenshots with Android Auto
- Using the built-in screenshot button in the Android Auto app
- Best practices for clear and accurate screenshots
- Saving and organising your captured screenshots
- Common Problems and Solutions
- Android Auto not displaying in developer mode
- Screenshot button not working debugging tips
- Alternatives for capturing screenshots if issues persist
- Practical Applications for Screenshots
- Using screenshots for app testing and debugging
- Sharing UI designs and workflows with teams
- Documentation and tutorials for Android Auto applications
- Conclusion
- Recap of the steps for taking screenshots
- Final tips for optimising the process
- Encouragement to explore Android Auto’s developer features further
Key challenges and limitations in capturing screenshots
Android Auto prioritises security and privacy, making screen capturing restricted in normal operation. However, enabling developer mode unlocks specific features, including an in-app screenshot tool that simplifies the process.
What is developer mode in Android Auto
Developer mode is a feature within Android Auto designed for testing and debugging. It provides access to advanced tools, allowing developers to test app performance, simulate different environments, and capture screenshots directly from the app.
Benefits of enabling developer mode for screenshots
Activating developer mode unlocks a built-in screenshot button in the Android Auto app on your smartphone. This eliminates the need for complex setups, enabling you to capture displays quickly and efficiently.
Risks and precautions when using developer mode
Developer mode alters certain default behaviours in Android Auto. Changes to settings may impact functionality or performance. Always use developer mode cautiously and restore settings to default after use if necessary.
Preparing to Take Screenshots

Prerequisites for capturing screenshots on Android Auto
Before proceeding, ensure you have the following:
- An Android smartphone with the Android Auto app installed
- A vehicle or head unit compatible with Android Auto
- A USB cable to connect your phone to the car
Tools and software required for the process
You don’t need any additional software beyond the Android Auto app when using the built-in screenshot tool. However, keeping your app updated ensures smooth functionality.
Ensuring your device and system are properly configured
Check that your Android Auto app is configured correctly. Ensure the app recognises your car, and the USB connection is stable. Activating developer mode is essential to enable the screenshot tool.
Enabling Developer Mode on Android Auto
Step-by-step guide to activating developer mode
- Open the Android Auto app on your smartphone.
Note: You may have to be connected to your car infotainment system to be able to do this. - Tap the hamburger menu or go to Settings.
- Scroll down to the About section and find the version number.
- Tap the version number repeatedly until a confirmation message indicates that developer mode is activated.
- Return to Settings, where a new Developer Options menu will now appear.
Troubleshooting issues when enabling developer mode
If developer mode doesn’t activate, ensure your Android Auto app is up to date. Restart the app or your device if necessary. For persistent issues, clear the app cache and try again.
Verifying that developer mode is active
Go to Settings and check for the Developer Options menu. If visible, developer mode is successfully activated. You can also test by navigating to new options within the app.
Taking Screenshots with Android Auto
Using the built-in screenshot button in the Android Auto app
- Open the Android Auto app on your smartphone.
- Navigate to Developer Options in the app settings.
- Locate the Screenshot button or link within the Developer Options menu.
- Tap 'Share screenshot now'. The app will capture the display and save it directly to your phone’s gallery or designated folder.

Best practices for clear and accurate screenshots
Ensure the car’s display is showing the content you want to capture before taking the screenshot. Avoid unnecessary clutter on the screen to ensure clarity. Check your phone’s storage to avoid any saving issues.
Saving and organising your captured screenshots
Screenshots are typically saved in a default folder within your phone’s gallery. Create a dedicated album or directory to organise them by project, date, or purpose for easy access.
Common Problems and Solutions

Android Auto not displaying in developer mode
If Android Auto isn’t displaying while in developer mode, ensure the USB cable is functional and the connection is secure. Reboot the infotainment system and your phone if needed.
Screenshot button not working debugging tips
If the screenshot button fails, verify that developer mode is enabled. Restart the Android Auto app, check for app updates, and ensure the phone has adequate storage space.
Alternatives for capturing screenshots if issues persist
If the built-in screenshot button doesn’t work, consider using third-party tools or mirroring the display on a secondary device to capture the content manually.
Practical Applications for Screenshots
Using screenshots for app testing and debugging
Screenshots allow developers to analyse interface layouts and identify bugs. They’re essential for diagnosing display issues and ensuring app functionality.
Sharing UI designs and workflows with teams
Screenshots are a convenient way to communicate design elements, workflows, or concepts with team members, improving collaboration and understanding.
Documentation and tutorials for Android Auto applications
Clear screenshots enhance documentation, making tutorials and guides more engaging and user-friendly. This is especially helpful for new users learning to navigate Android Auto.
Conclusion
Recap of the steps for taking screenshots
Taking screenshots in Android Auto involves enabling developer mode, accessing the Developer Options menu, and using the built-in screenshot button for efficient capture.
Final tips for optimising the process
Always ensure your Android Auto app is up to date, and keep your device storage organised. Test the setup beforehand to avoid any interruptions.
Encouragement to explore Android Auto’s developer features further
Developer mode offers numerous tools beyond screenshots. Explore these features to optimise app performance and enhance the Android Auto experience.