
Things to do with a Nokia 9500 Communicator
Q. I just got a Nokia 9500 Communicator and I want to really make some use of its capabilities. What are the top things I must master to get the most out of the device?
TL:DR – The article that follows was written in 2004 and is interesting mostly for the screenshots of defunct phones and software.
Contents
- Things to do with a Nokia 9500 Communicator
- Install PC Suite
- (Difficulty level – Easy) (Value – High)
- Configure your Communicator and then set up PC Suite
- (Difficulty – moderate) (Value – High)
- Configure the suite for use with your Communicator
- (Difficulty – moderate) (Value – High)
- Synchronise contacts and calendar and to do’s
- (Difficulty – Moderate) (Value – Essential)
- Set up WiFi on a Nokia 9500 Communicator
- heading3
- Set up GPRS Internet access
- (Difficulty level – Hard to Impossible in 2024) (Value – Negligible)
Ok so you’ve set the date, time and language and made a call but you can do that on any handset. You’ve heard that the 9500 Communicator is capable of so much but what can you really do to get the most out of it as soon as you have some time. I think there are some real essentials to getting the most out a 9500 and here they all are:
- Install PC Suite
- Configure your Communicator and PC Suite for Bluetooth
- Synchronise your Contacts and Calendar and To Do’s
- Set up WiFi Internet access
- Set up GPRS Internet and email access
Install PC Suite
(Difficulty level – Easy) (Value – High)
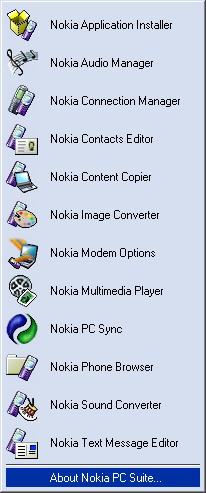
Download and install PC Suite: Find a copy of Nokia PC Suite it was on a CD with the device originally but that may not be the latest version, then select the 9500 Communicator and Windows and download the application. Once downloaded and Installed PC Suite installs a handy system tray menu application for quick access to its functions.
Configure your Communicator and then set up PC Suite
(Difficulty – moderate) (Value – High)
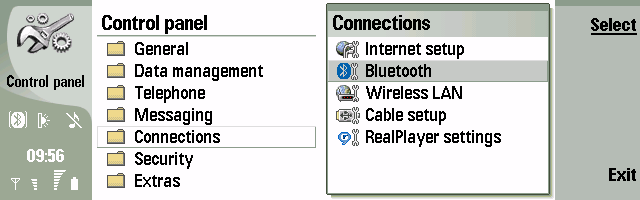
Turn Bluetooth on: On your 9500 make sure Bluetooth is switched on. Go into Tools, and open the control panel. Once open choose connections -> Bluetooth and Press the ‘Select’ button.
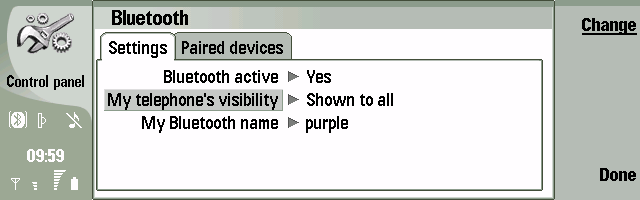
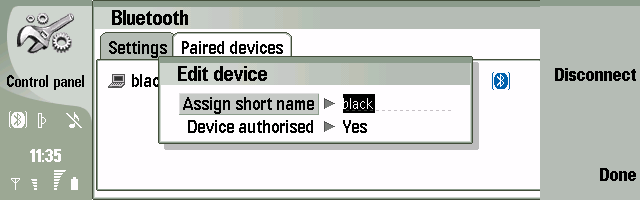
Now make sure ‘Bluetooth active’ is set to ‘Yes’, and your telephone visibility is set to ‘Shown to all’ and now is also a good time to choose a good Bluetooth name for your device that isn’t obvious to anyone else. Mines called ‘purple’. The Bluetooth symbol will appear in the bottom left area of the 9500 and on the outside display.
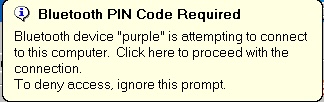
Pair your 9500 with your PC: Select the ‘Paired devices’ tab and click search and then once your PC is found (my PC is called ‘black’) Press ‘Pair’ and supply a Bluetooth PIN code (any key sequence will do as its only used once). e.g. 123

Note: If your PC doesn’t show up make sure Bluetooth is on and the device is visible and retry. Quickly on the PC click to respond to the notification and the PIN code request dialog box will appear. If you aren’t quick enough it times out so just repeat until successful.
Type in the PIN you previously entered on your 9500. e.g. 123, and click the OK button.
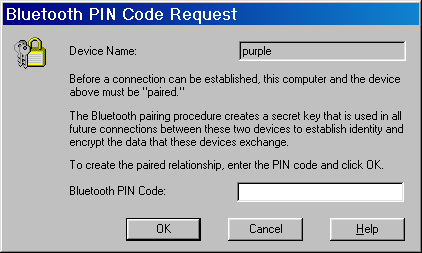
Optionally you can set the PC as an authorised device to make future connections avoid asking for a PIN passcode each time you make a connection. Press ‘Done’ when completed.
Congratulations. You have paired your 9500 and your PC. This will make future connections easy because you wont have to go through this rigmarole again.
Configure the suite for use with your Communicator
(Difficulty – moderate) (Value – High)
The most flexible way to connect is over Bluetooth. The Nokia 9500 Communicator supports Bluetooth connectivity using the WIDCOMM software stack version 1.4 or later as used by many popular Bluetooth cards and USB dongles. It also supports the Digianswer Bluetooth Software Suite and the Windows XP Bluetooth stack. This example uses WIDCOMM 1.4 on a TDK Bluetooth PC Card.
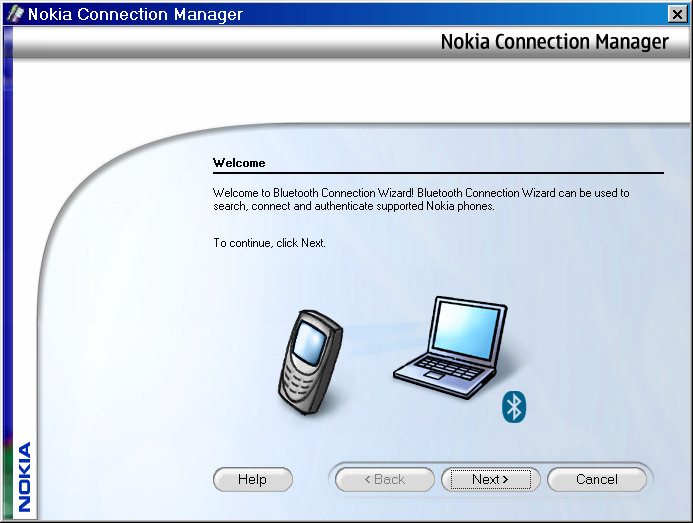
Choose ‘Nokia Connection Manager’ (click right on the PC Suite system tray application icon and choose the third application down the list), to continue click ‘Next’ to start the Nokia Connection Manager Bluetooth connection wizard.
Click the Bluetooth checkbox, and then click configure and then click next to search for your 9500.
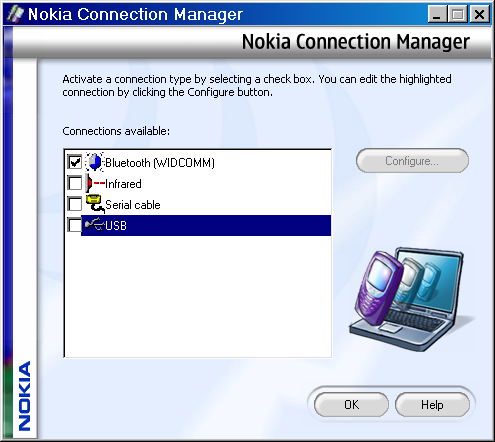
Note: Make sure your 9500 bluetooth is on before clicking next otherwise your device won’t be found.
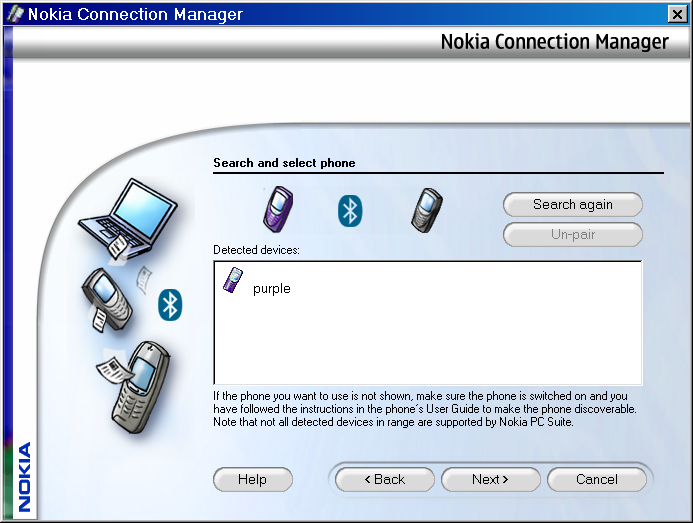
Right so if you’ve got this far you should see your 9500 in the ‘Detected devices’ area of the window. And youre ready to select it. Select your 9500 by clicking it to highlight it, then click ‘Next’
Note: You may have to scroll down to find your 9500 if you have a lot of Bluetooth devices in range.
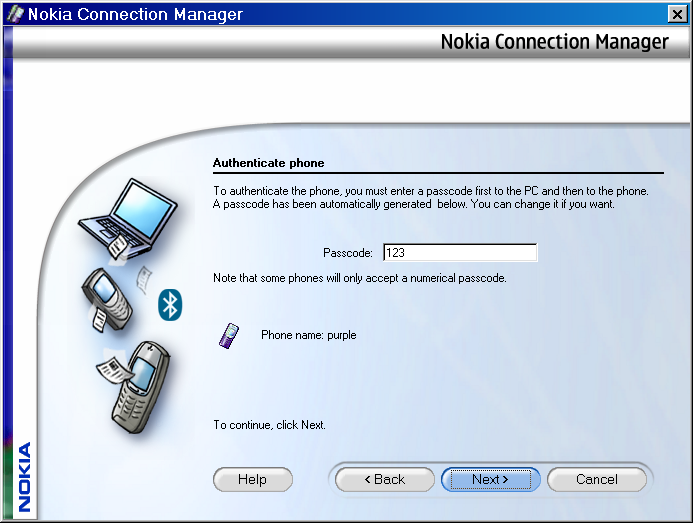
To authenticate your 9500 press ‘Next’ and if prompted then key the Passcode on the 9500.
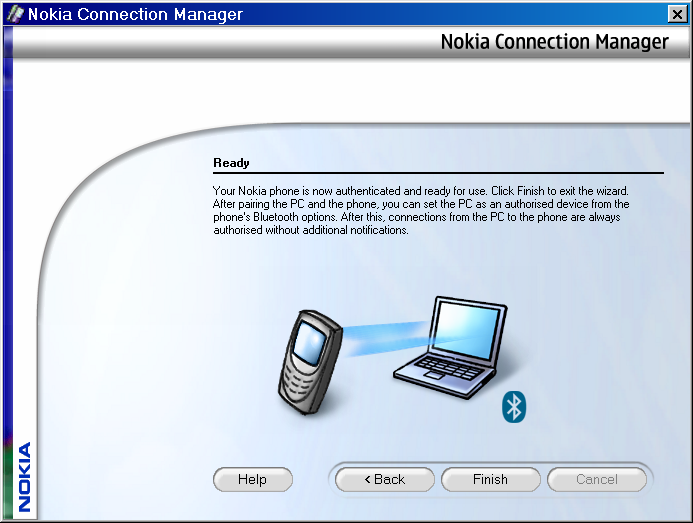
Now your 9500 is ready to be used. Click ‘Finish’ and then ‘OK’ to complete the Nokia Connection Manager configuration.
Now you have completed the connection configuration its time to actually do something useful with your 9500.
Synchronise contacts and calendar and to do’s
(Difficulty – Moderate) (Value – Essential)
Choose ‘Nokia PC Sync’ (click right on the PC Suite system tray application icon and choose the ninth application down the list).
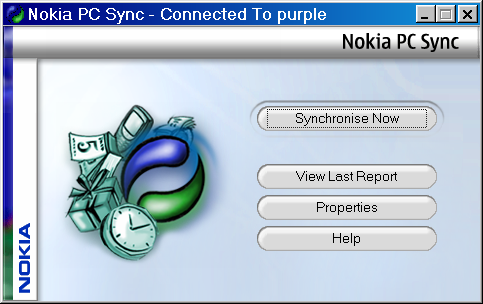
The PC Sync title bar should indicate that it is connected to your 9500 already. If not recheck your Bluetooth connectivity from your 9500 to your PC.
To set up Sync click ‘Properties’
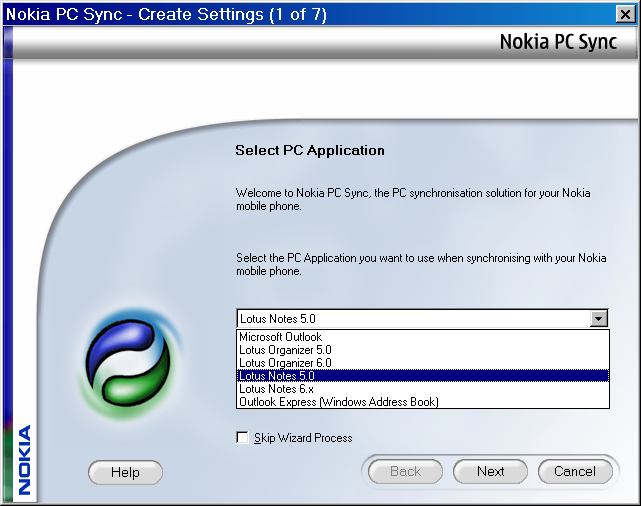
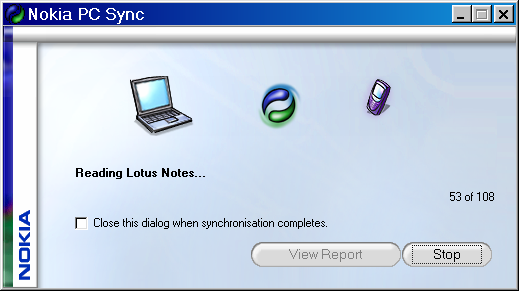
From here you can select the application that contains your contacts and calendar data. I was using Lotus Notes but the steps are similar whatever your application (a limited number of these applications still work today). Choose your application and click ‘Next’.
Important: Uncheck the ‘Email Items’ checkbox if you are going to set up your email to work over the Internet connection! If you leave it checked you will be able to sync your email when you are in range of your PC but I think its preferable to have a direct send and receive connection to my mailbox even when my PC isn’t on.
Click ‘Next’

Again because I’m using Notes I have to enter some Notes specific information, and in ‘Advanced’ I can enter my notes password. It should default the correct information based upon my Notes Profile settings.
If you are using a different application of course you will need to enter the application specific information and then
Click ‘Next’
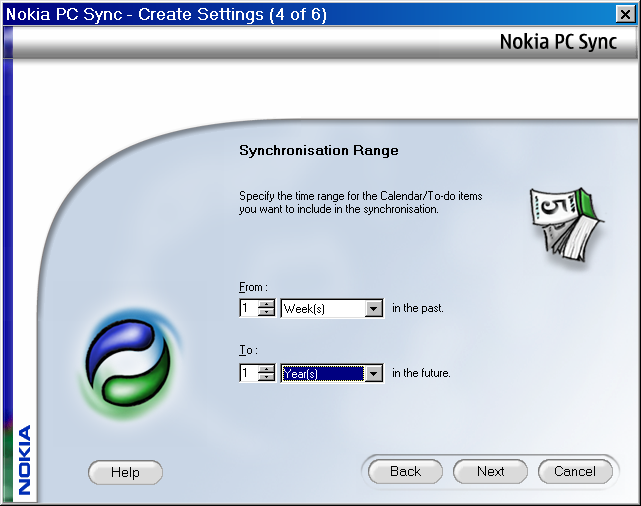
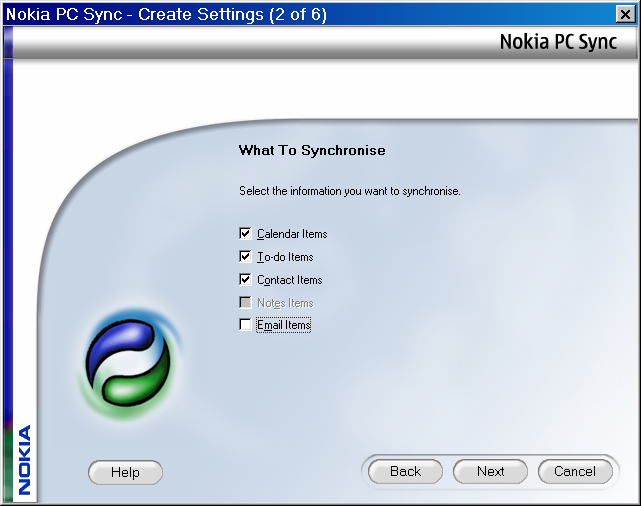
Now you can enter the Synchronisation range. Ive chosen a week in the past to a year in the future.
Click ‘Next’
Now enter the level of detail you are interested in from your contact data
I’ve chosen ‘All Details’
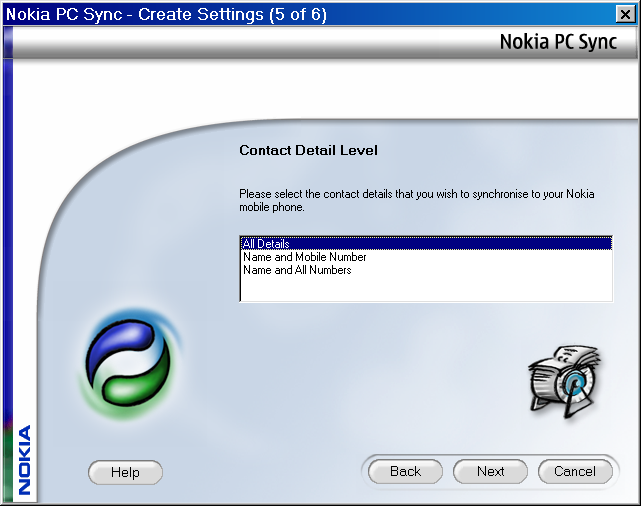
Click ‘Advanced’ if you want to get fine control over how your synchronisation works
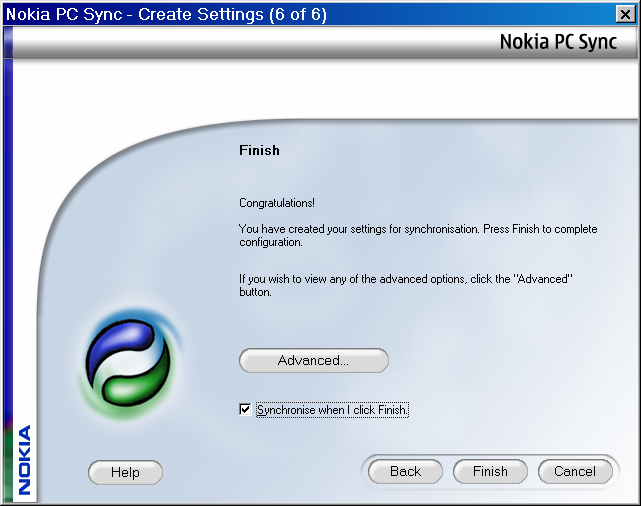
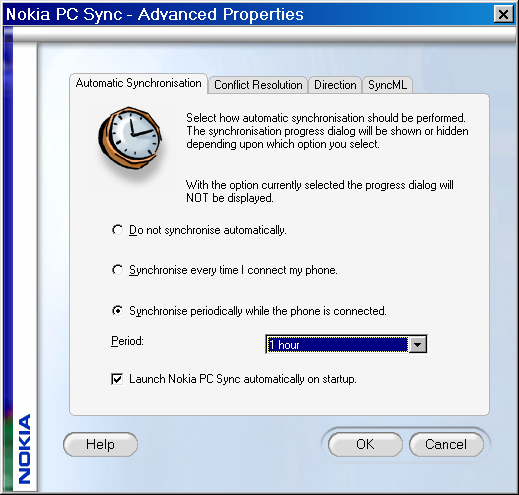
I’ve set my Synchronisation to happen every hour when my 9500 is connected.
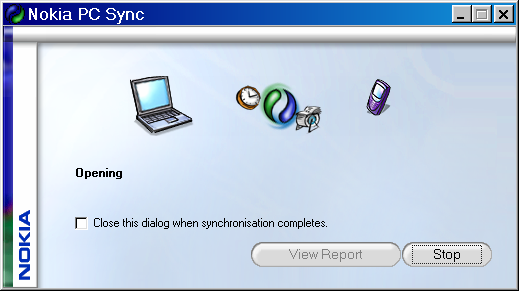
Click ‘Finish’ and Synchronisation should launch. Leave it until it finishes. First time through it may take some time to complete. It will display what it is doing.

Congratulations. You’ve completed your first Synchronisation. Its always a good idea to sync again a couple of times to make sure its working the way you want. Make a couple of entries on the 9500 and a couple of different ones on your PC application. Make sure they show up in both places once you have synched.
Now you are finally able to have one contact list for your phone and your PC and benefit from better productivity as a result.
Your 9500 will synchronise on the schedule you set whenever it is in range. Now that’s usefull!
Optional Task: Clean up your contacts database
Next time you are on a long train journey go through your contacts database deleting duplicates and organising things to work well on your 9500. Try to get it so that you have a single contact entry per name, and multiple ways of reaching that contact in the contact record details. People often have multiple entries per name with different short codes to indicate the type of number – fred home, fred mobile etc etc. This isn’t necessary on a 9500 because a contact can have many numbers and email addresses.
Set up WiFi on a Nokia 9500 Communicator
heading3
To set up your 9500 to use a wireless LAN based on 802.11b or WiFi you need to be within range and then its quite straightforward.
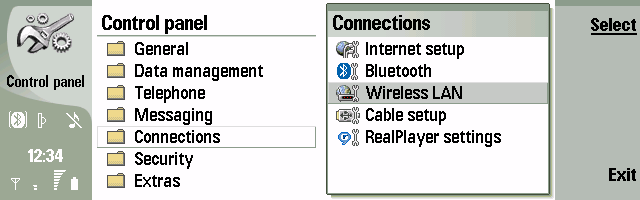
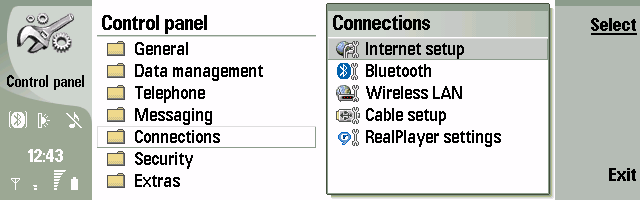
On your 9500 go into Tools, and open the control panel. Once open choose connections -> Wireless LAN and Press the ‘Select’ button.
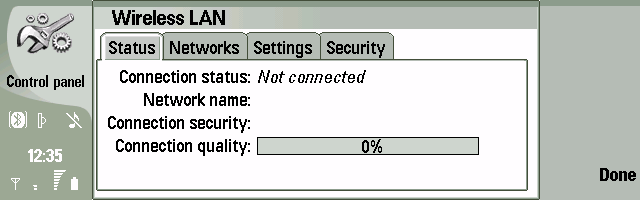
Now you should see this screen, and you need to select the ‘Networks’ tab by clicking ‘up’ and ‘right’
You should see a list of wireless networks in range.
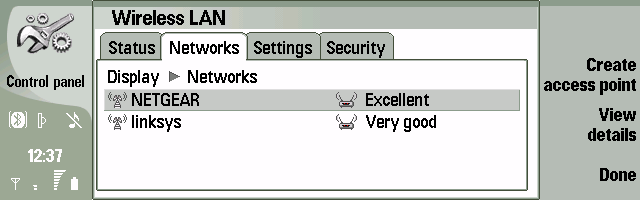
Select the Wireless network you want to connect to and press ‘Create access point’
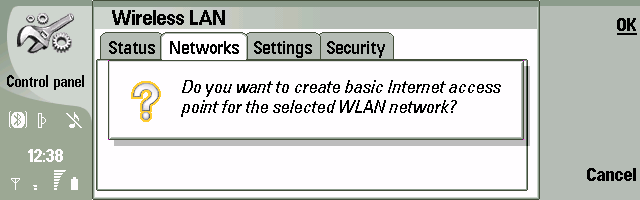
Press ‘Ok’ and you have created a basic access point.
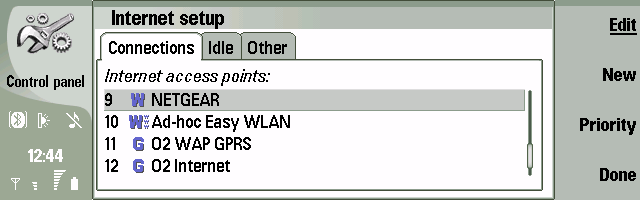
To edit the access point to provide optional details like Security information you need to open the control panel again and choose connections -> Internet setup and click the ‘Select’ button.
Find your recently created access point on the list and Press ‘Edit’
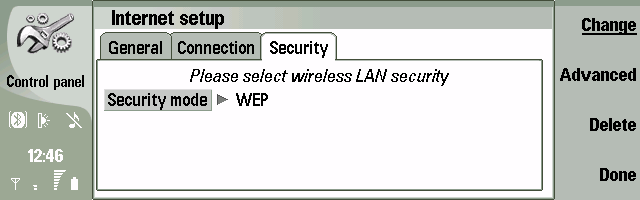
From here you can set the security mode if there is one on your network. If your wireless network is secure you will need to ask your friendly network manager for a security key.
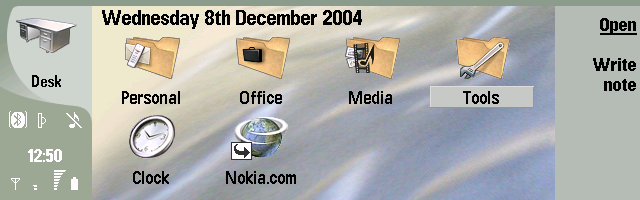
Exit back to the Desk application to test your Wireless network connection.
Press the Nokia.com shortcut.
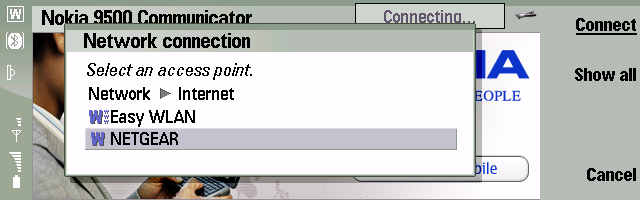
Select ‘Network’ Internet and then select your newly configured access point.
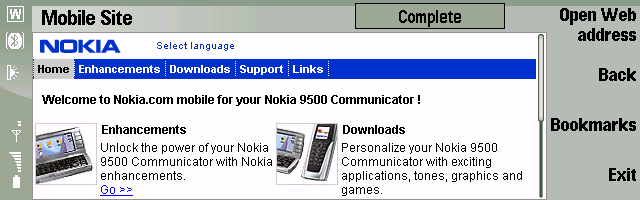
Press ‘Connect’ and your browser will connect over your wireless network which means that there is no phone bill for a data connection! You can Press ‘Open Web address’ to get to your favourite sites.
Set up GPRS Internet access
(Difficulty level – Hard to Impossible in 2024) (Value – Negligible)
To set up your 9500 to use a GPRS connection to the Internet you need to have a GPRS enabled Sim Card or you will not get very far. Check with your mobile network operator before continuing.
Download the Settings Wizard for Nokia 9500

Now you need to install the downloaded software.
Choose ‘Nokia Application installer’ (click right on the PC Suite system tray application icon and choose the first application down the list)
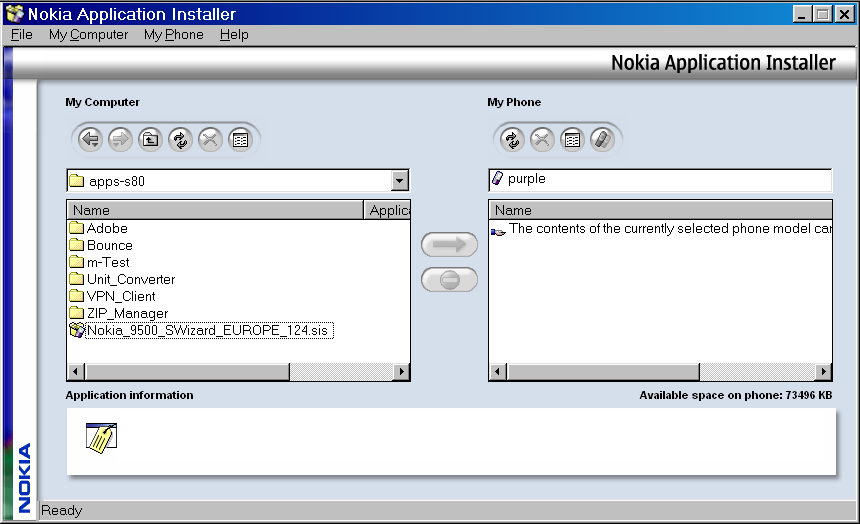
Find your downloaded application and click to select it, and then click the arrow to install it on your 9500.
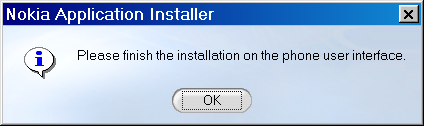
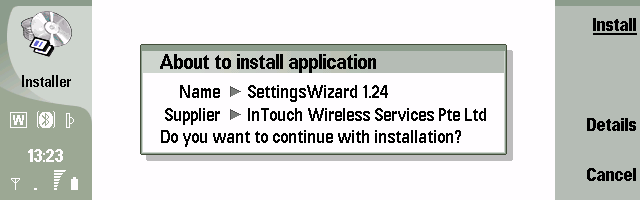
When prompted, go back to your 9500 to complete the installation.
Press ‘Install’
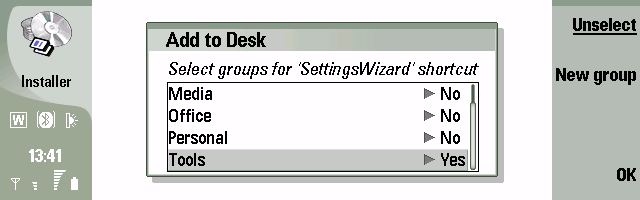
Add the application shortcut to the group you desire by Selecting ‘Yes’ and Press ‘OK’.
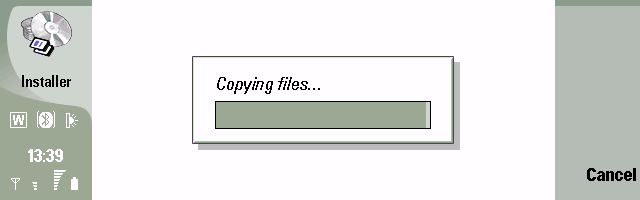
Press ‘Ok’ again to complete the installation.
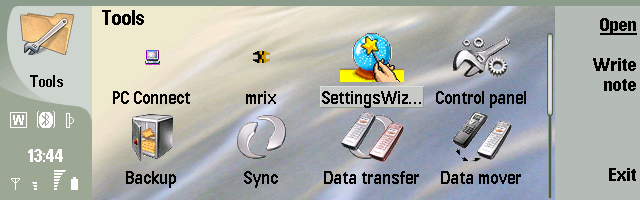
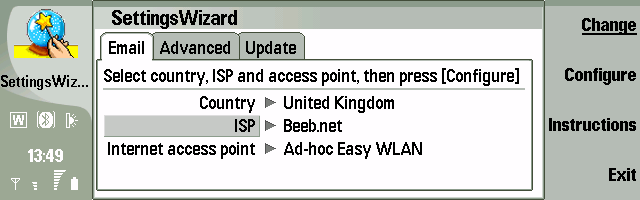
Select the Settings Wizard and Press ‘Open’.
Settings Wizard detects your mobile network operator and creates the correct GPRS access points, and has a comprehensive set of information for many email providers so that it can set up email too. If your email provider isn’t there just pick another one and you can edit the details later.
Press ‘Configure’ and your settings will be updated.
Now you can connect to your mobile network operators data network.

To check your GPRS Internet access settings go into Tools, and open the control panel. Once open choose connections -> Internet Settings and Press the ‘Select’ button.
Scroll down the list until you see the settings you created with the Settings Wizard. You can edit the settings manually if desired by pressing ‘Edit’. See if they work ‘as is’ first.
To check your email access settings go into Tools, and open the control panel. Once open choose Messaging -> and then your email provider you just set up with the settings wizard and Press the ‘Select’ button.
Make sure you have the correct username and password and email address for your email.
In 2004 it was useful to set outgoing mail to go via your mobile network operator, but you should not do this today.
I hope you enjoyed this little trip down memory lane. You might like this article too: Remember Symbian? Some screenshots and notes